.png)
The purpose of this feature is to manage the shipments and their related settings through the following functionalities:
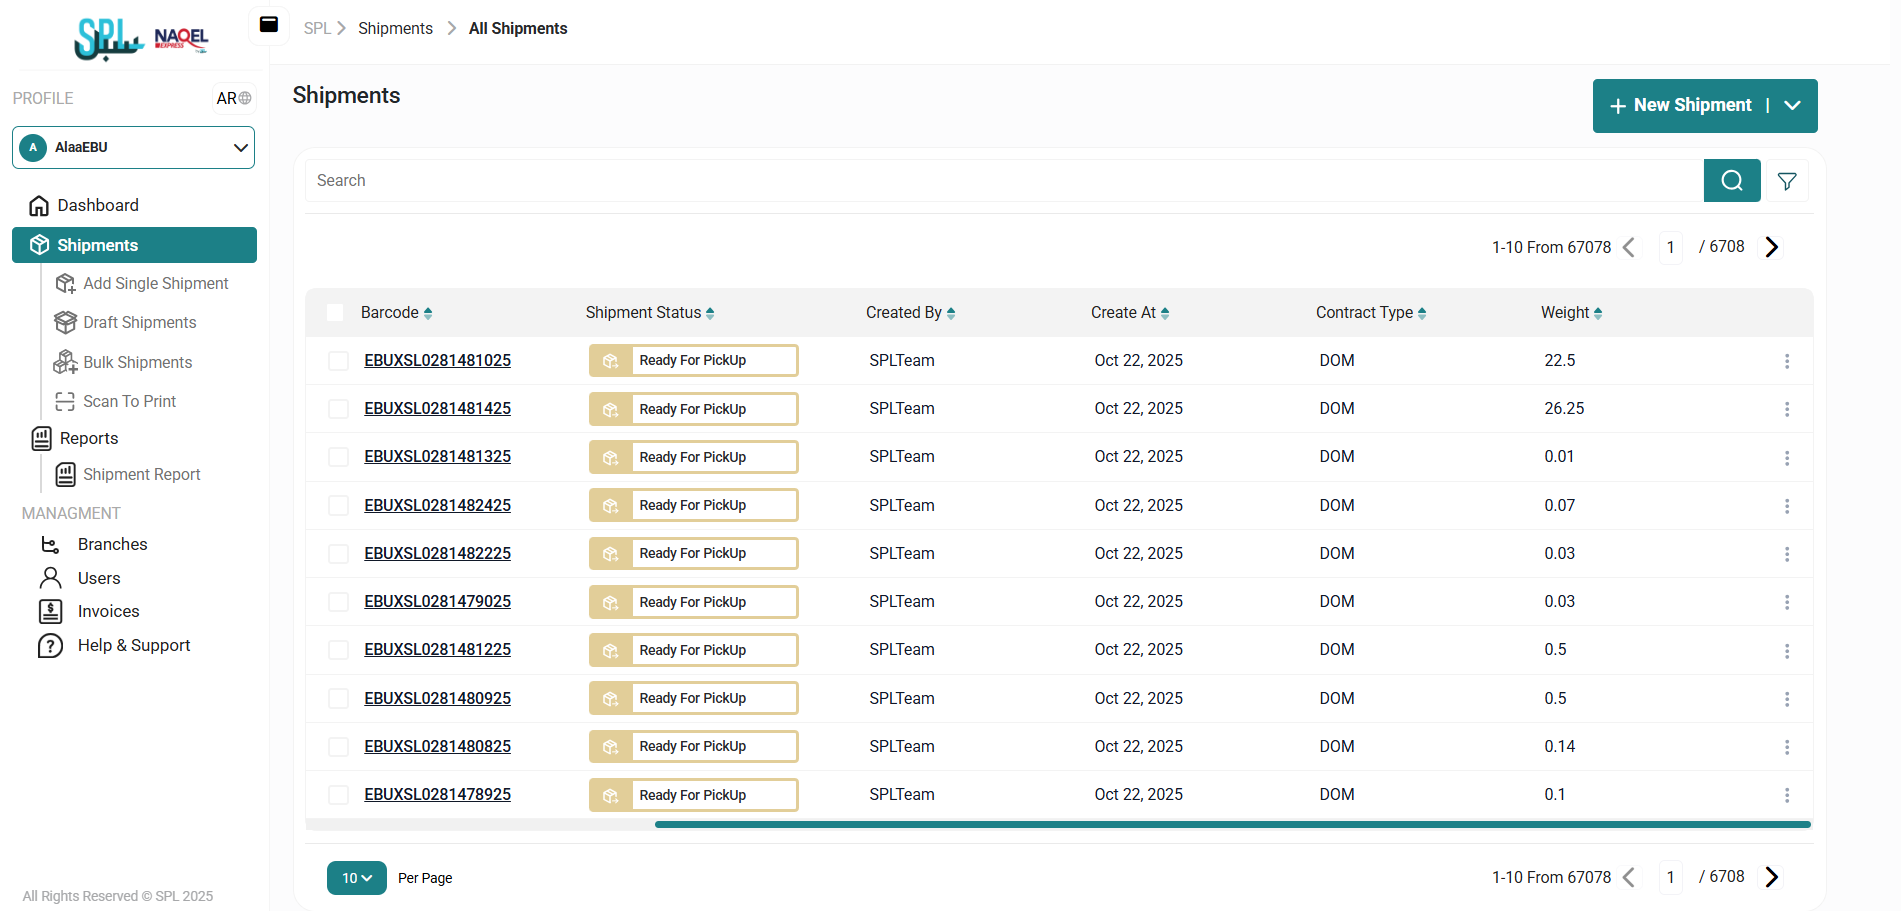
2.1 View Shipment
The user can view the defined shipments in the system by navigating to the ‘Shipments’ screen by choosing the Shipment Module from the left navigation panel as follows:
-
New Shipment: the user can add two types of shipments: single shipment or bulk uploading by chose New Shipment button.
-
Search: the user can search for the shipment by typing the AWB number in the search filter field.
-
Filters: the user can search by typing in the search filter field.
-
Per Page: the user can select the number of items to show on each page.
-
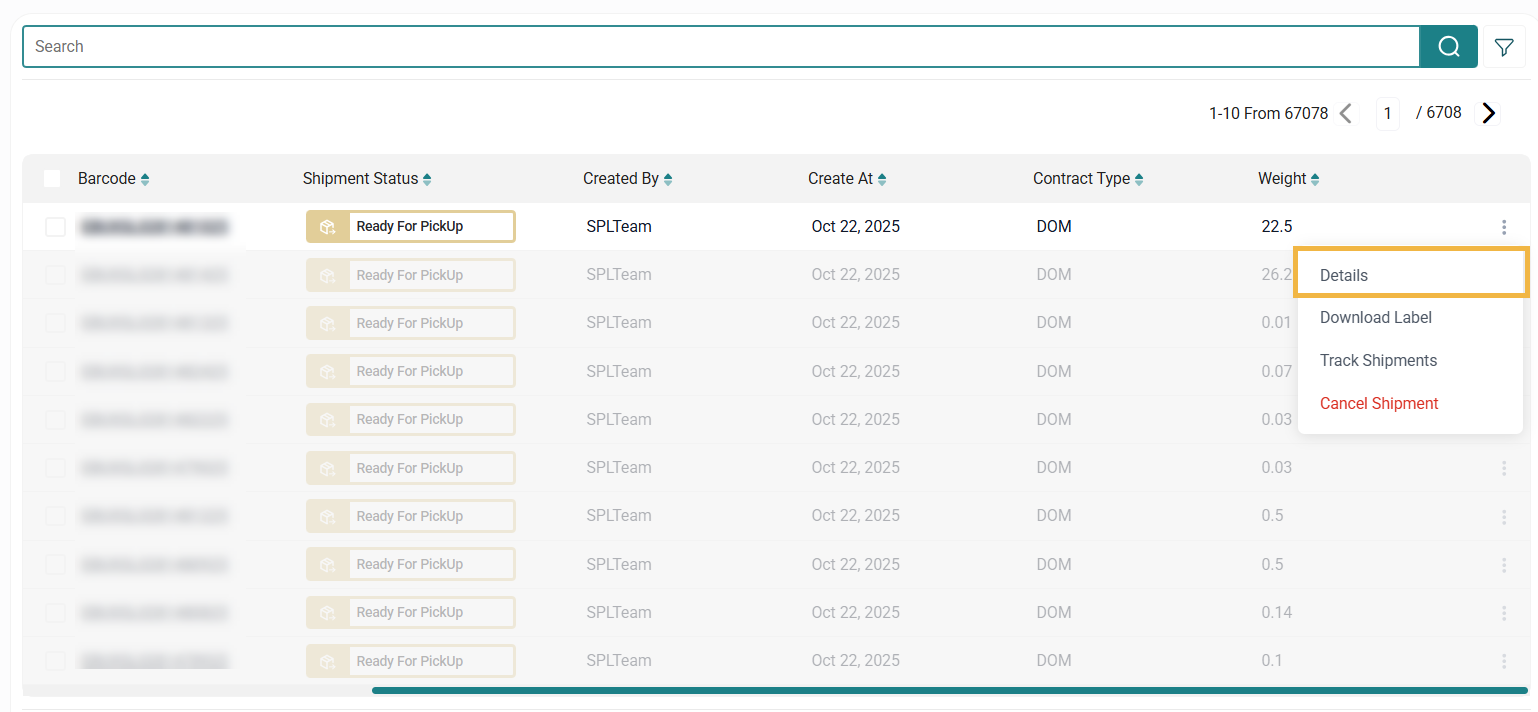
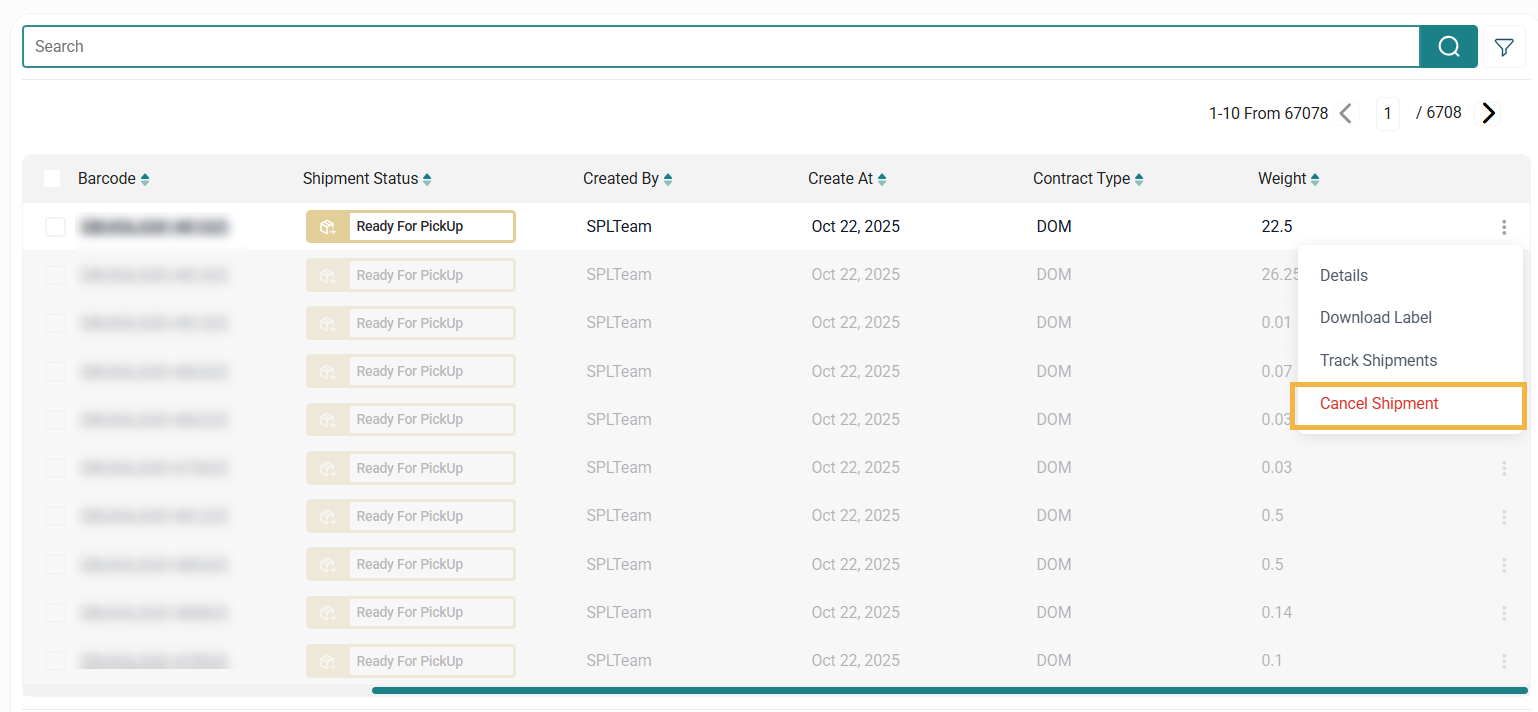
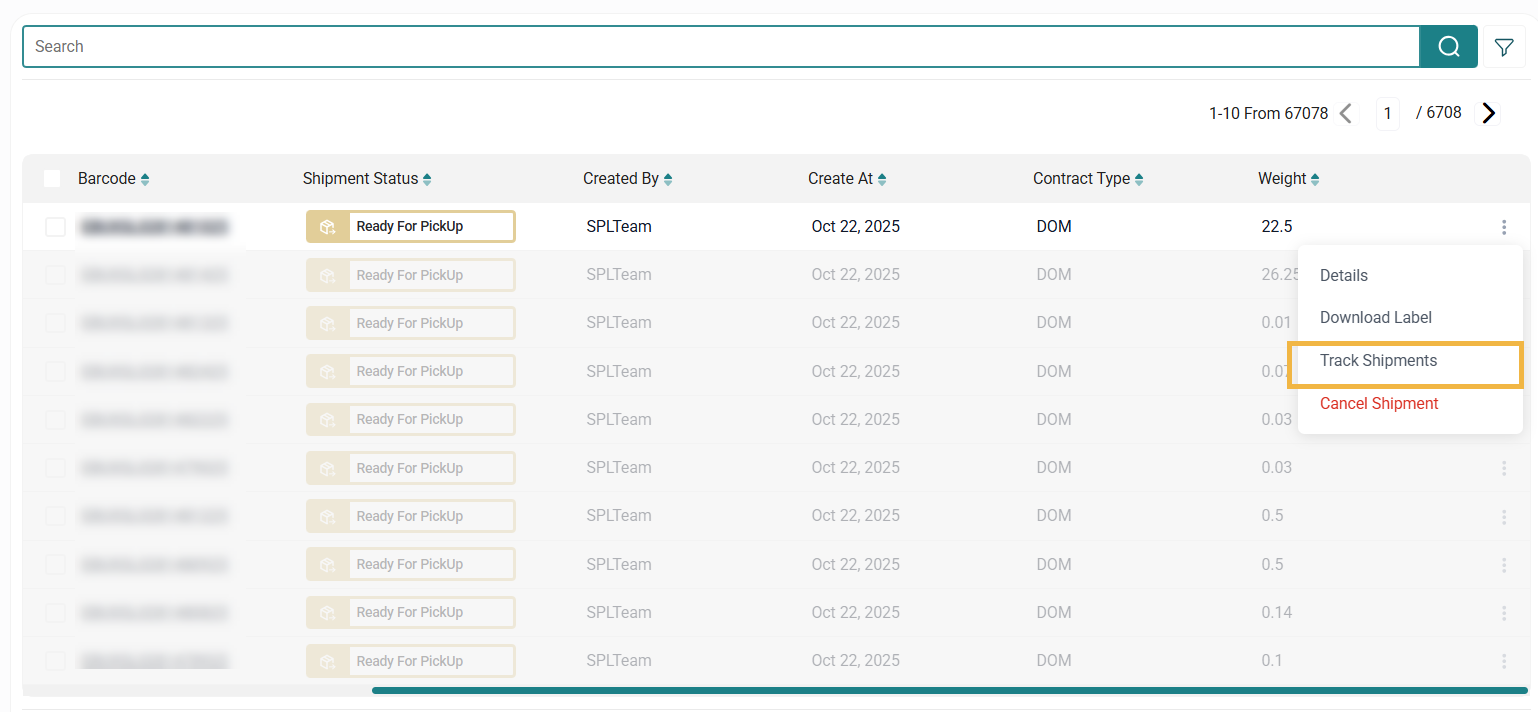
Actions: by clicking on this button, the user can view specific shipment details by referring to the View Shipment Details section, download a label by referring to the Download Label section, cancel shipment by referring to the Cancel Shipment section, or track shipment by referring to the Track Shipment section as follows:

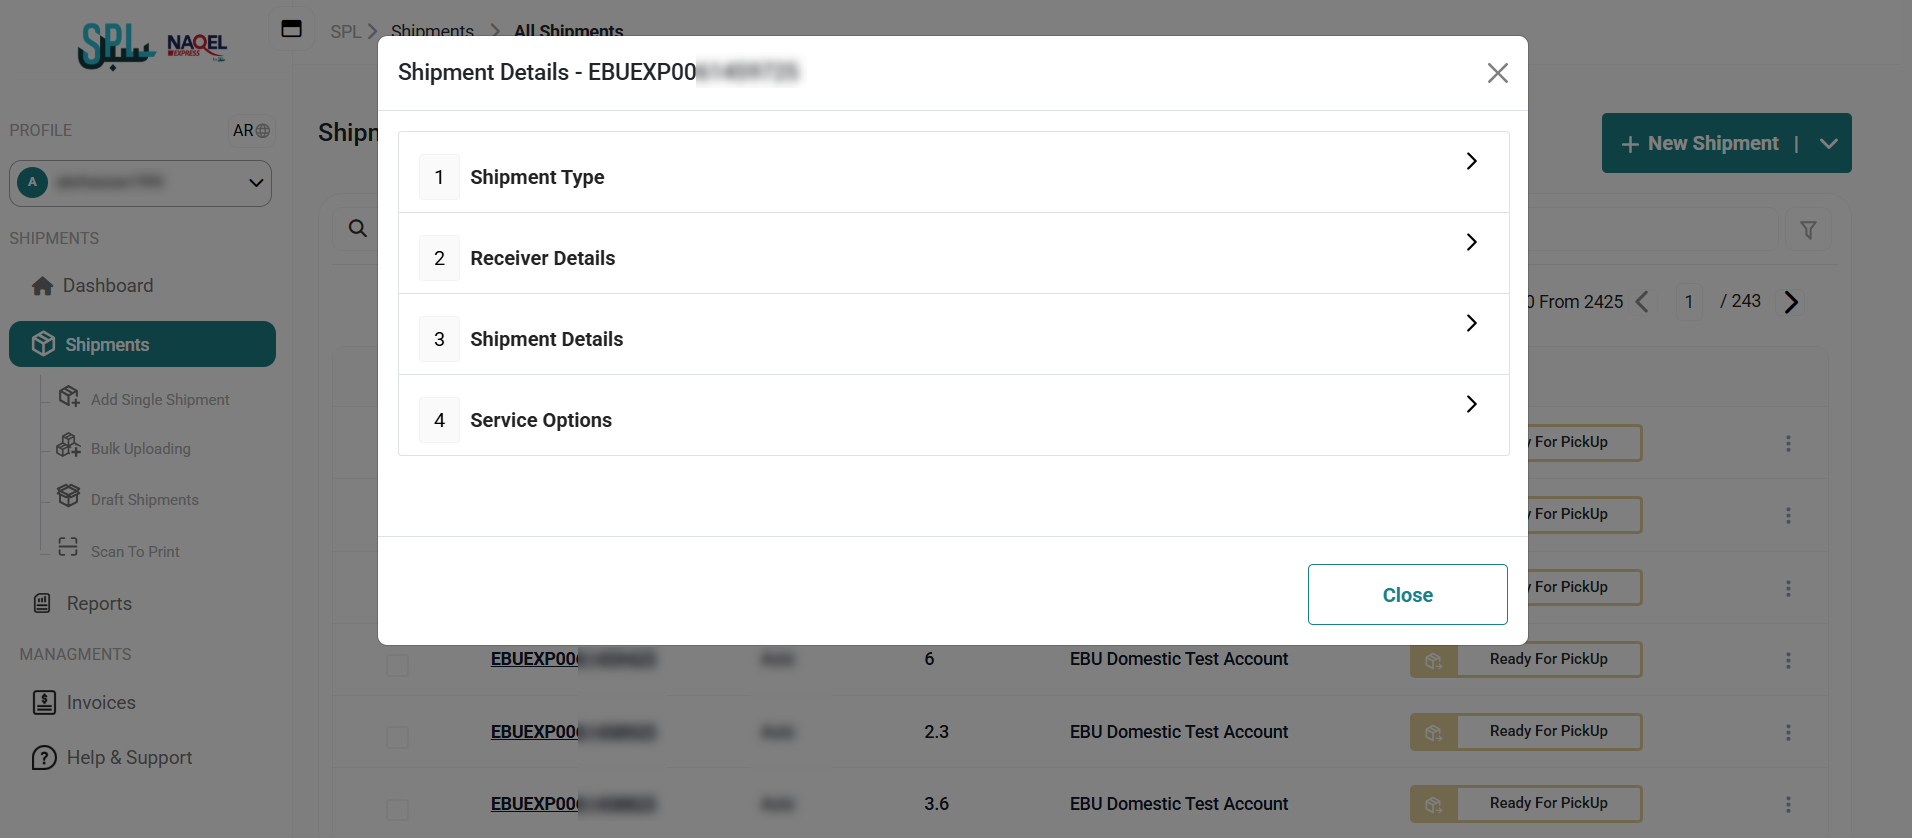
2.1.1 View Shipment Details
The user can view the shipment details already defined on the system by navigating to the ‘Shipment’ screen via the Shipments Module and clicking on Details from Actions as follows:
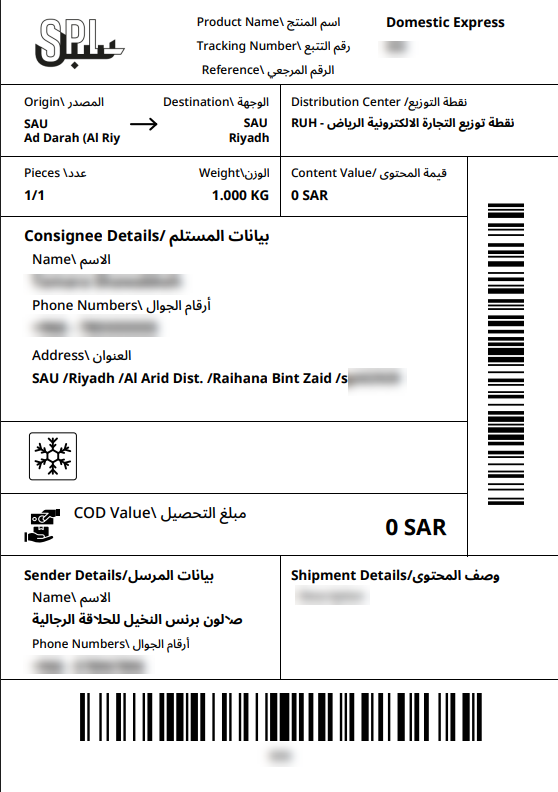
2.1.2 Download Label
The user can download the shipment label for printing it by navigating to the ‘Shipments’ screen via the Shipments Module and clicking on Download Label from Actions as follows:

2.1.3 Cancel Shipment
The user can cancel the shipment ready for pick up, pending payment, and distribution by navigating to the ‘Shipments’ screen via the Shipments Module and clicking on Cancel Shipment from Actions.
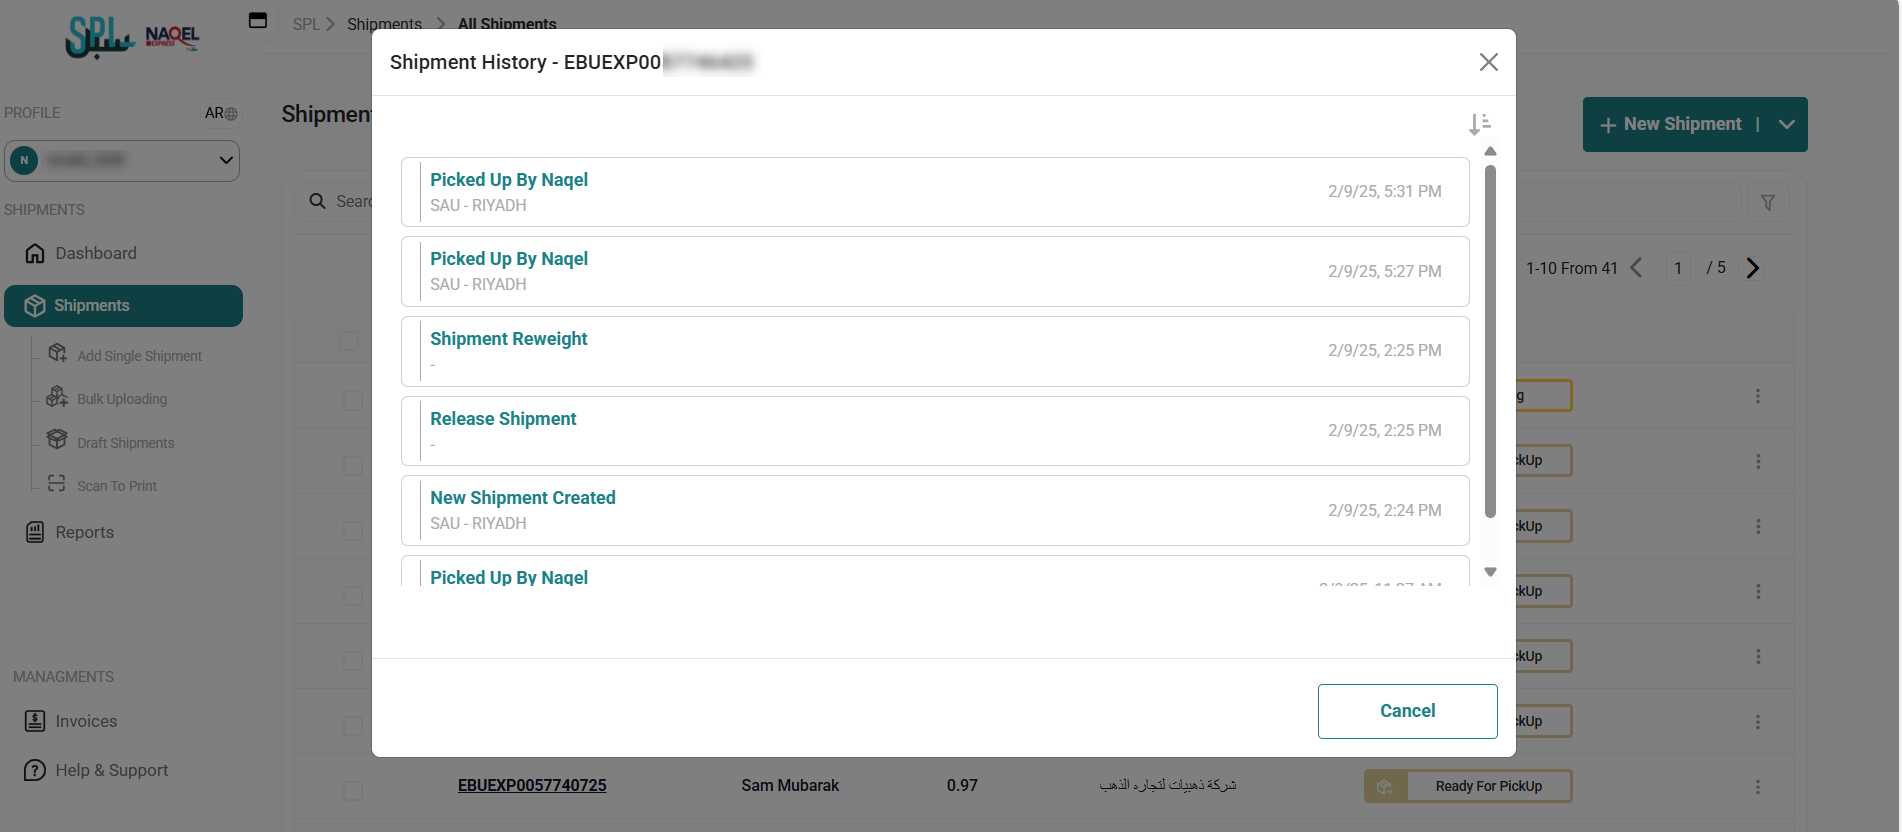
2.1.4 Track Shipment
The user can view the shipment history and all events on the shipment by navigating to the ‘Shipments’ screen via the Shipments Module and clicking on Track Shipment from Actions as follows:
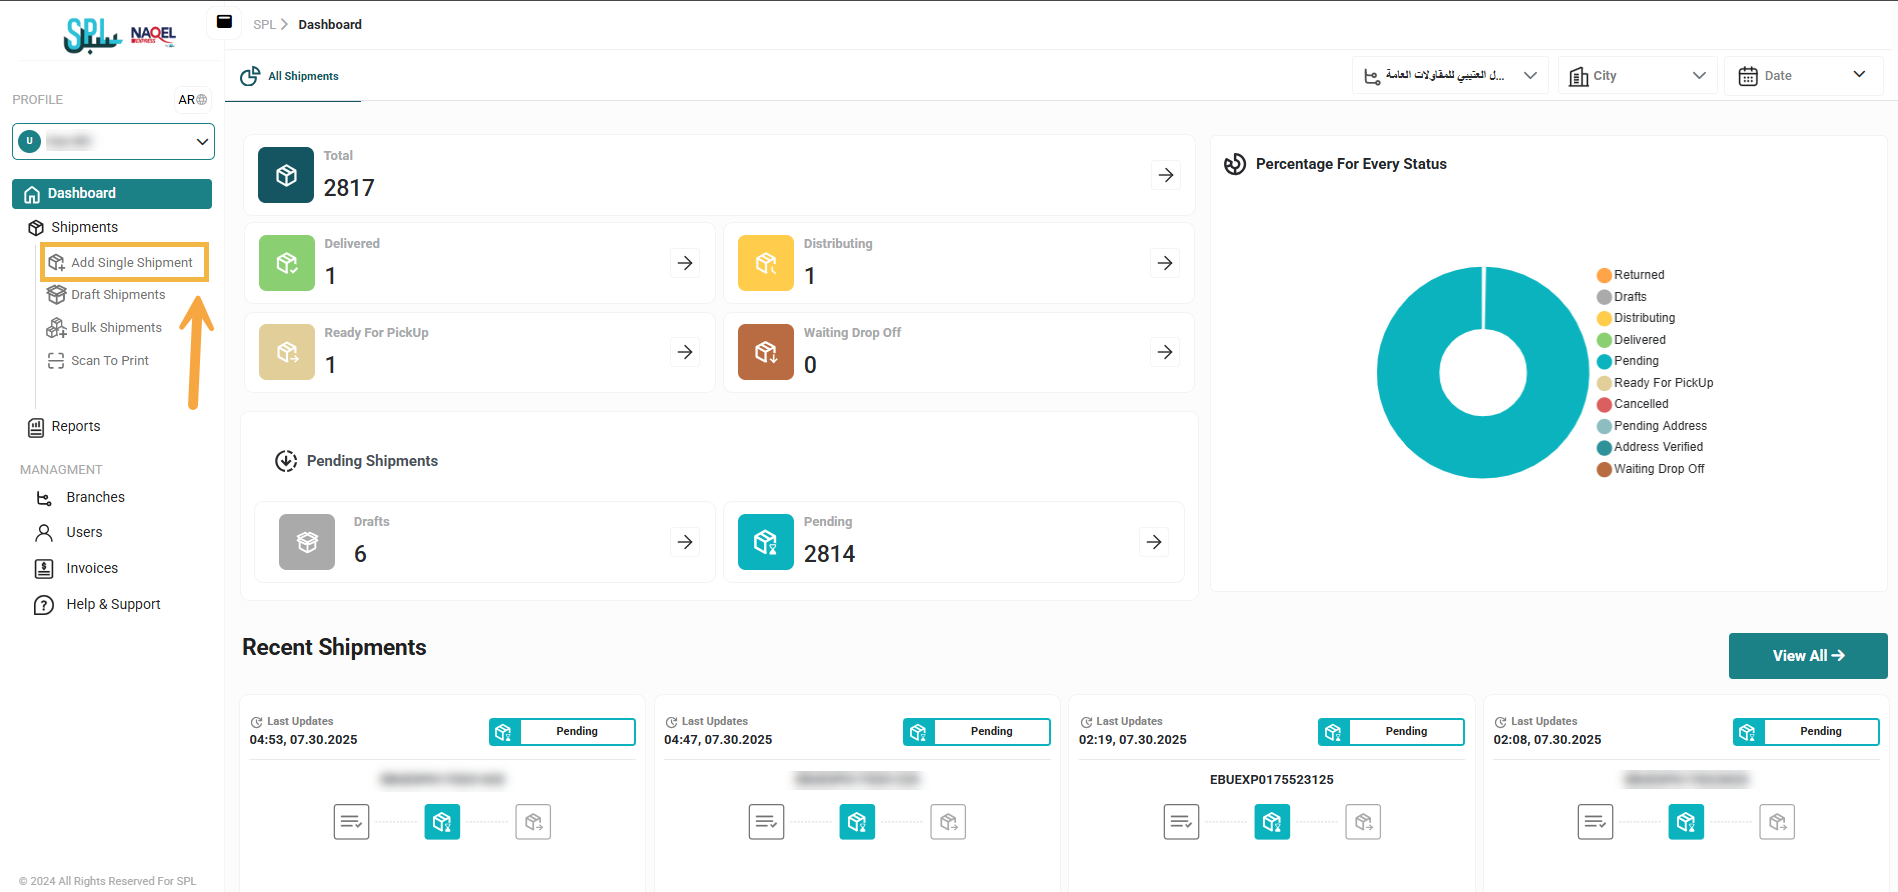
2.2 Add Single Shipment
The user can create new single shipment by navigating to the ‘Add single Shipment’ screen via the Shipments Module and clicking on Add Single Shipment as follows:
Add a shipment for a normal user
-
From the side menu, choose Add Single Shipment.
-
Fill in the fields with the required information for the shipment type:
-
Select the contract type predefined in the system (required).
-
Select the pickup branch, i.e., the branch associated with the contract (required).
-
Select the type of shipment (parcel Or papers or documents).
-
Select the pickup option: Pick up from selected branch or drop off to nearest SPL branch.
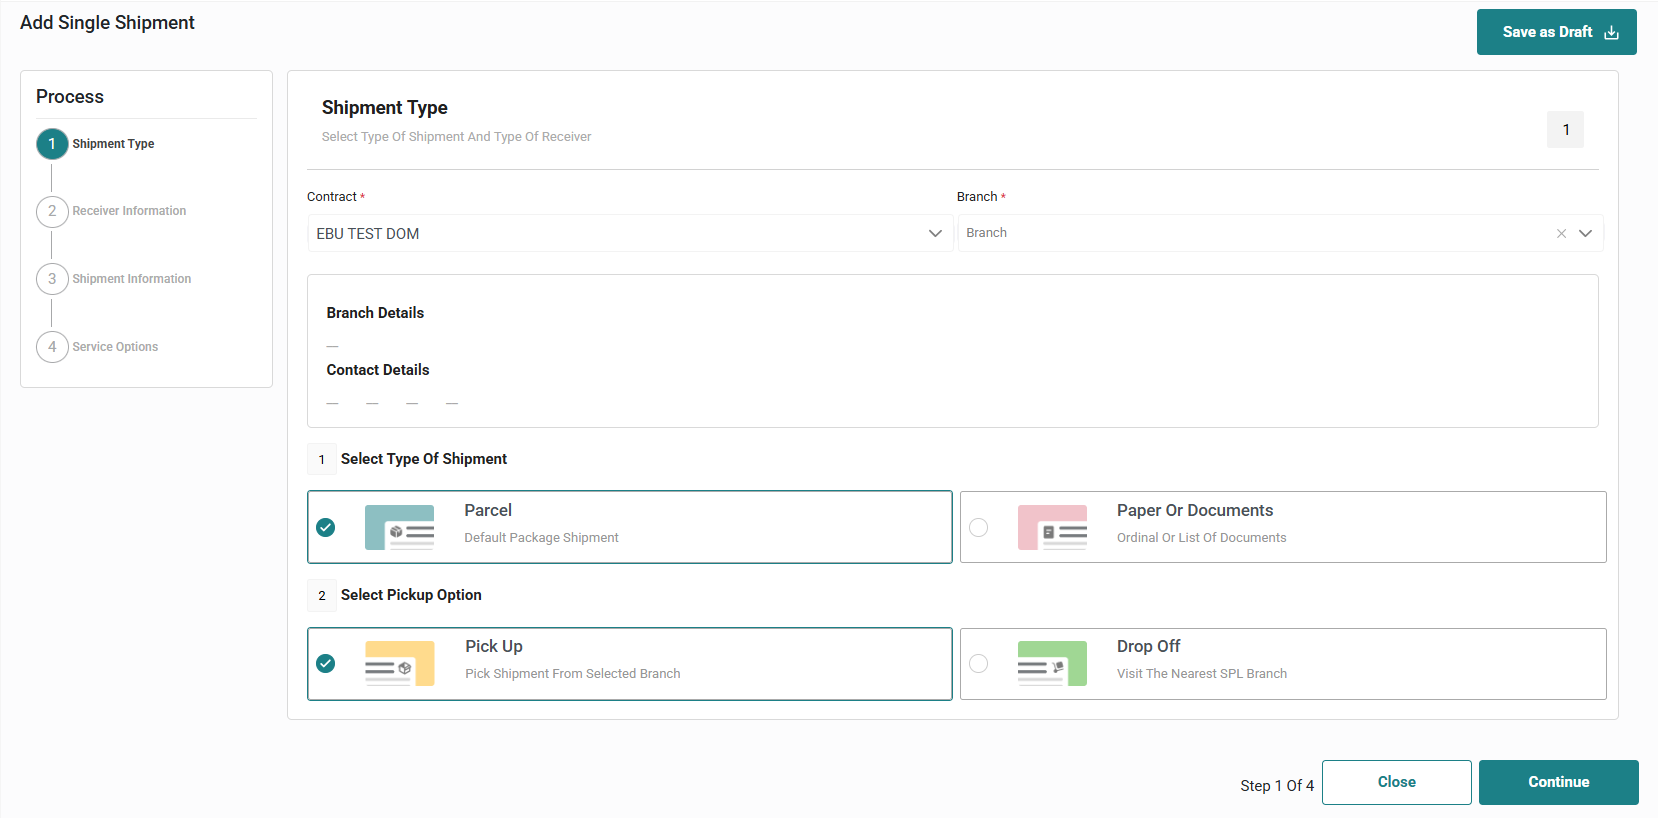
Click "Continue" to move to the next step:
-
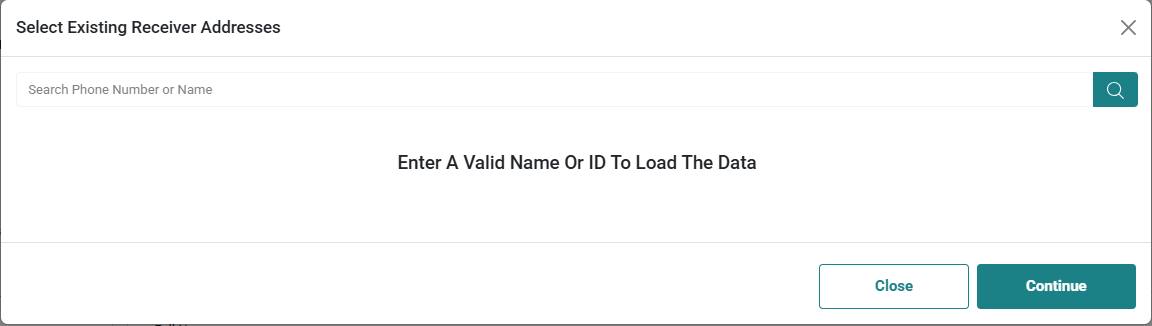
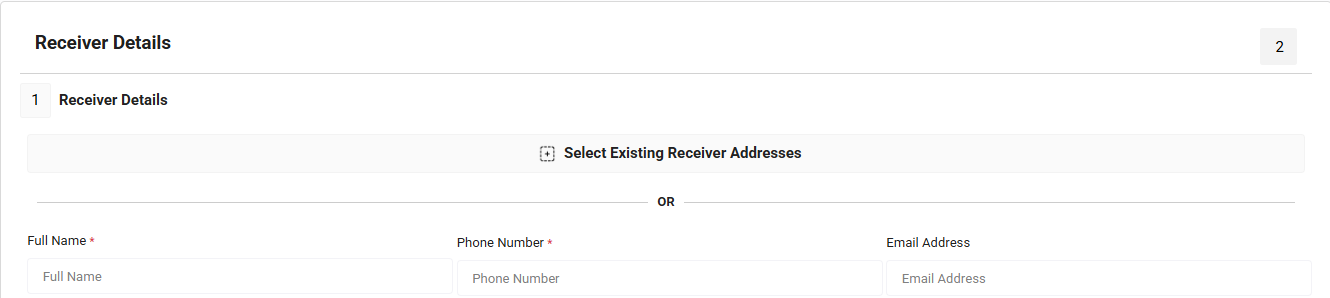
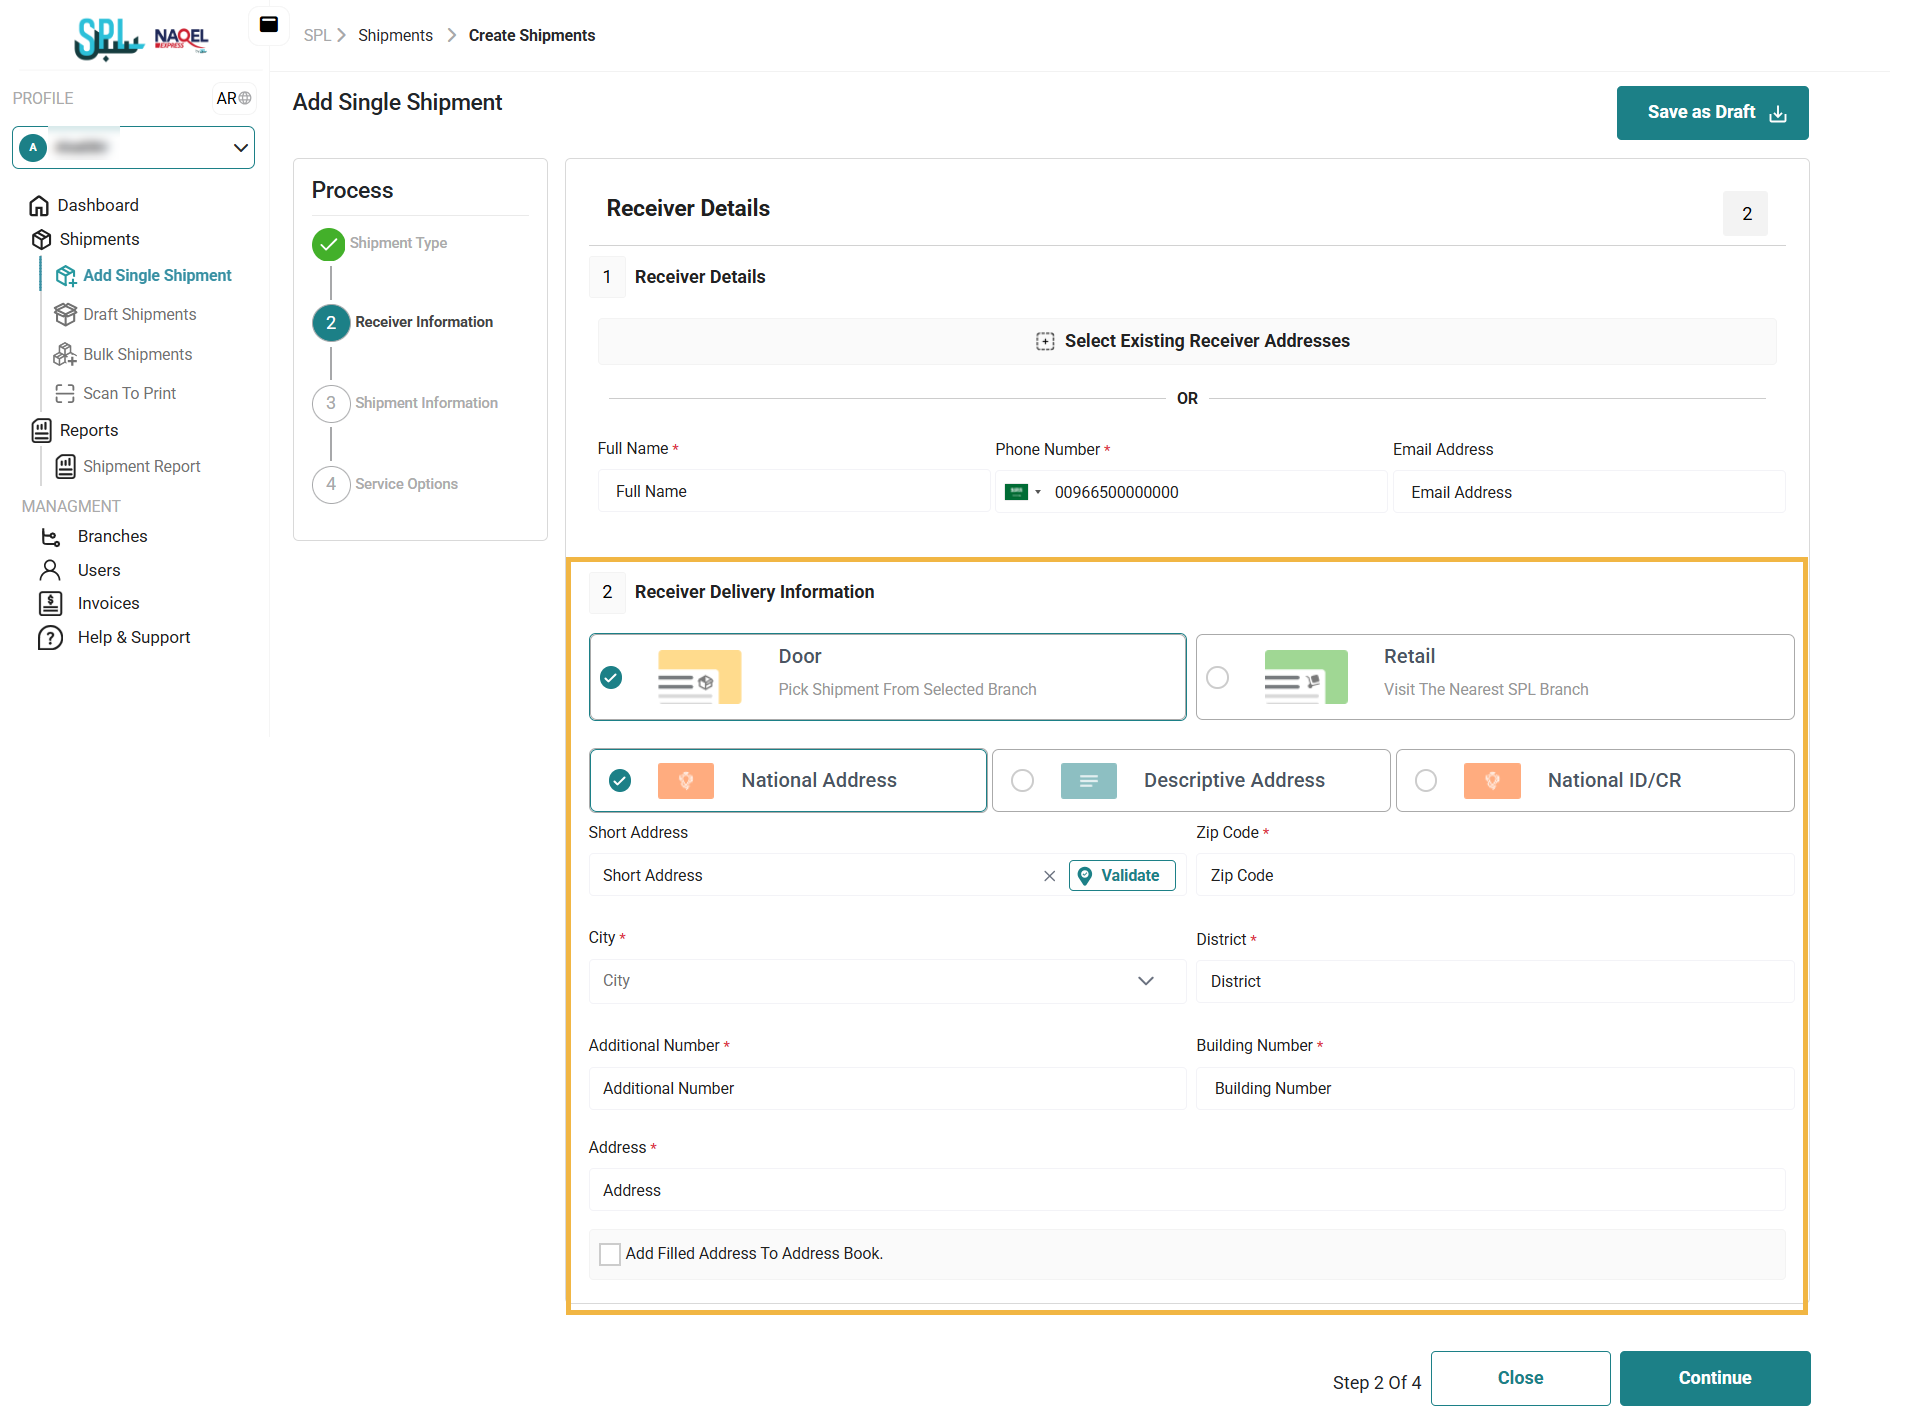
Select a receiver from a list of previously defined customers or define a new receiver.
Or create a new receiver:
-
Full Name: this field represents the full name of the receiver and must not exceed 20 characters.(required).
-
Mobile Number: this field represents the receiver’s phone number and must be entered in the correct format. The mobile number should start with 05, 009665, or +9665, followed by 8 digits.(required).
-
Email Address: this field represents the receiver's email address.
-
Fill in the delivery information and the delivery type. If "Door" is selected, the system will automatically direct you to choose the address type, either the National Address or the Descriptive Address.
If the National Address is selected, the following required information must be filled in:
-
Short address
-
Zip Code (required)
-
City (required)
-
District (required)
-
Additional number (required)
-
Building number (required)
If the Descriptive Address option is selected, the following required information must be provided:
-
City (required)
-
District (required)
-
Nearest landmark
-
Address (required)
When the checkbox is selected, the system will automatically save the address information to the address book.
If the National ID/CR option is selected, the following required information must be provided:
-
Civil ID (required)
-
National CR (required)
-
City (required)
-
District (required)
-
Zip Code (required)
-
Additional Number (required)
-
Building Number (required)
-
When the delivery type "Retail" is selected, the system will automatically navigate to the option Parcel Station or SPL Branch:
If Parcel Station is selected, the following required information must be filled in:
-
City (required)
-
Parcel Station (required)
If SPL Branch is selected, the following required information must be filled in:
-
City (required)
-
SPL Branch (required)

Click "Continue" to move to the next step:
-
Fill in the shipment details:
-
Weight (required)
-
Number of pieces (required)
-
Reference ID
-
Shipment value: must be greater than 0
-
Length
-
Width
-
Height
-
Goods description (required)
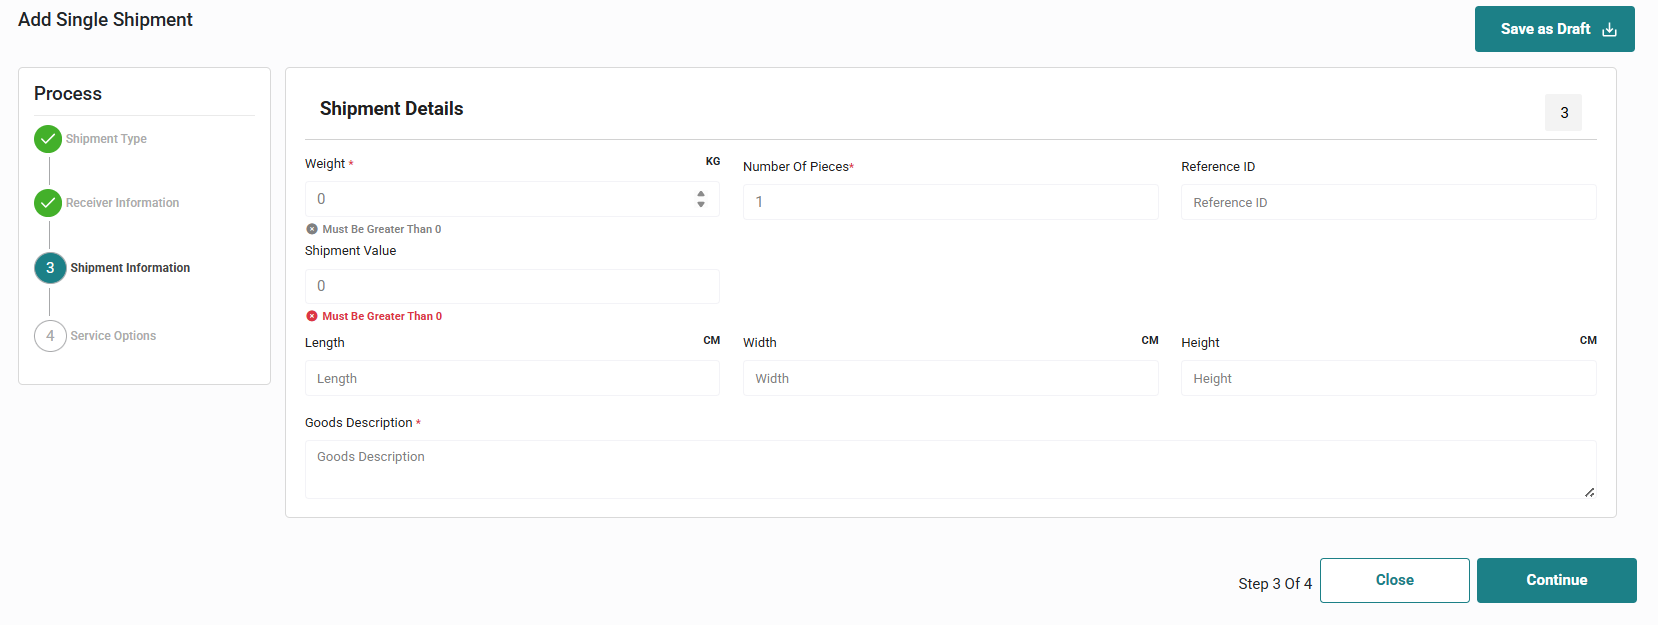
Click "Continue" to move to the next step:
-
Fill in the service options information, including payment options and delivery time.
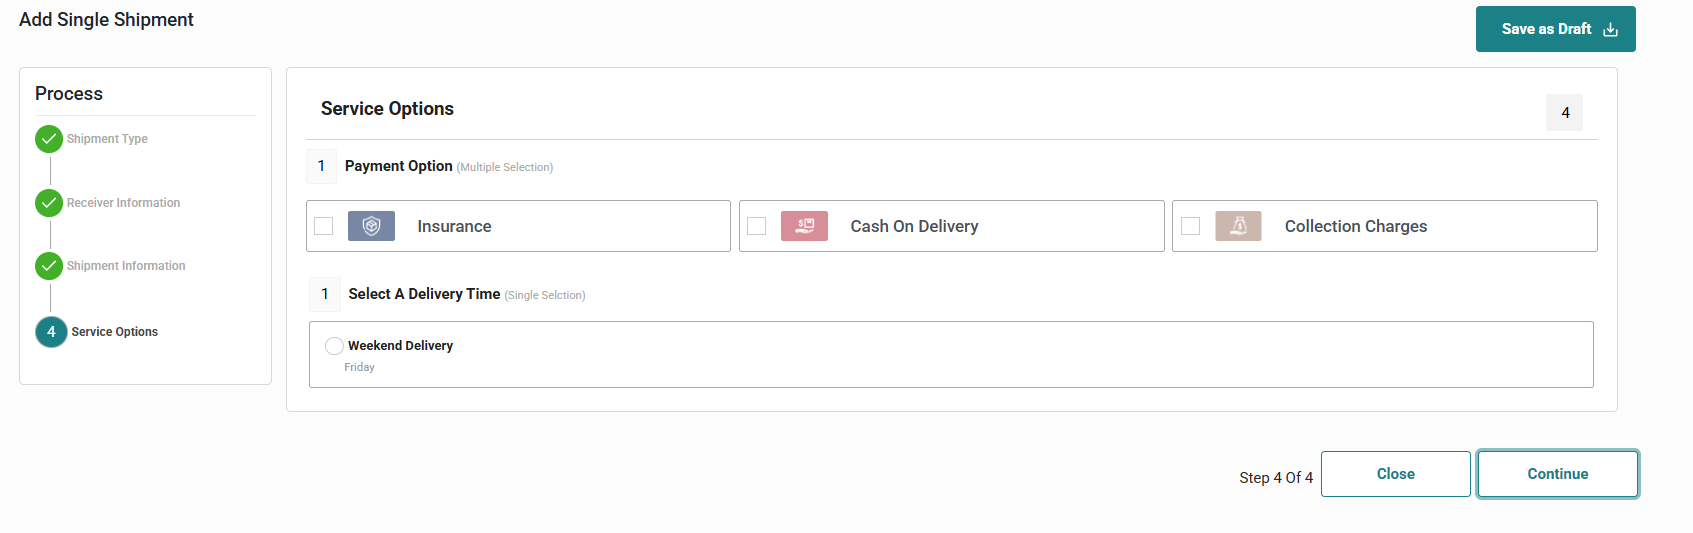
Click "Continue" to move to the next step:
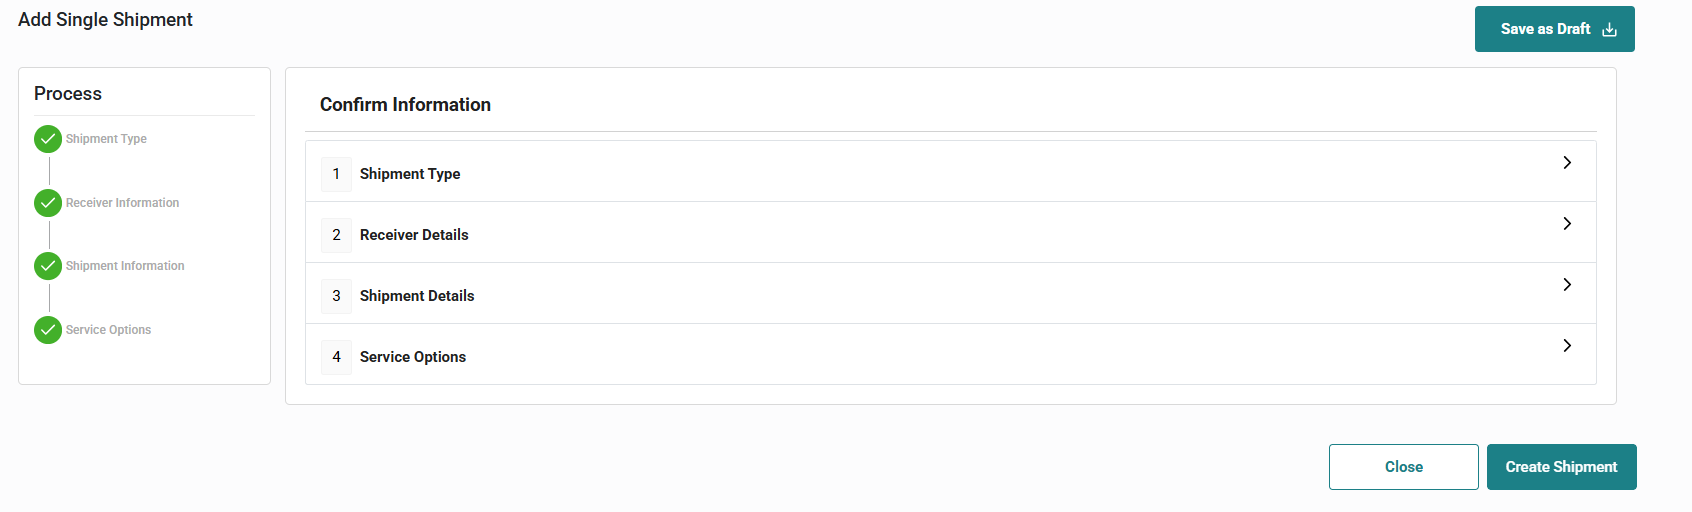
-
Click on the Create Shipment button to create the shipment in the system.
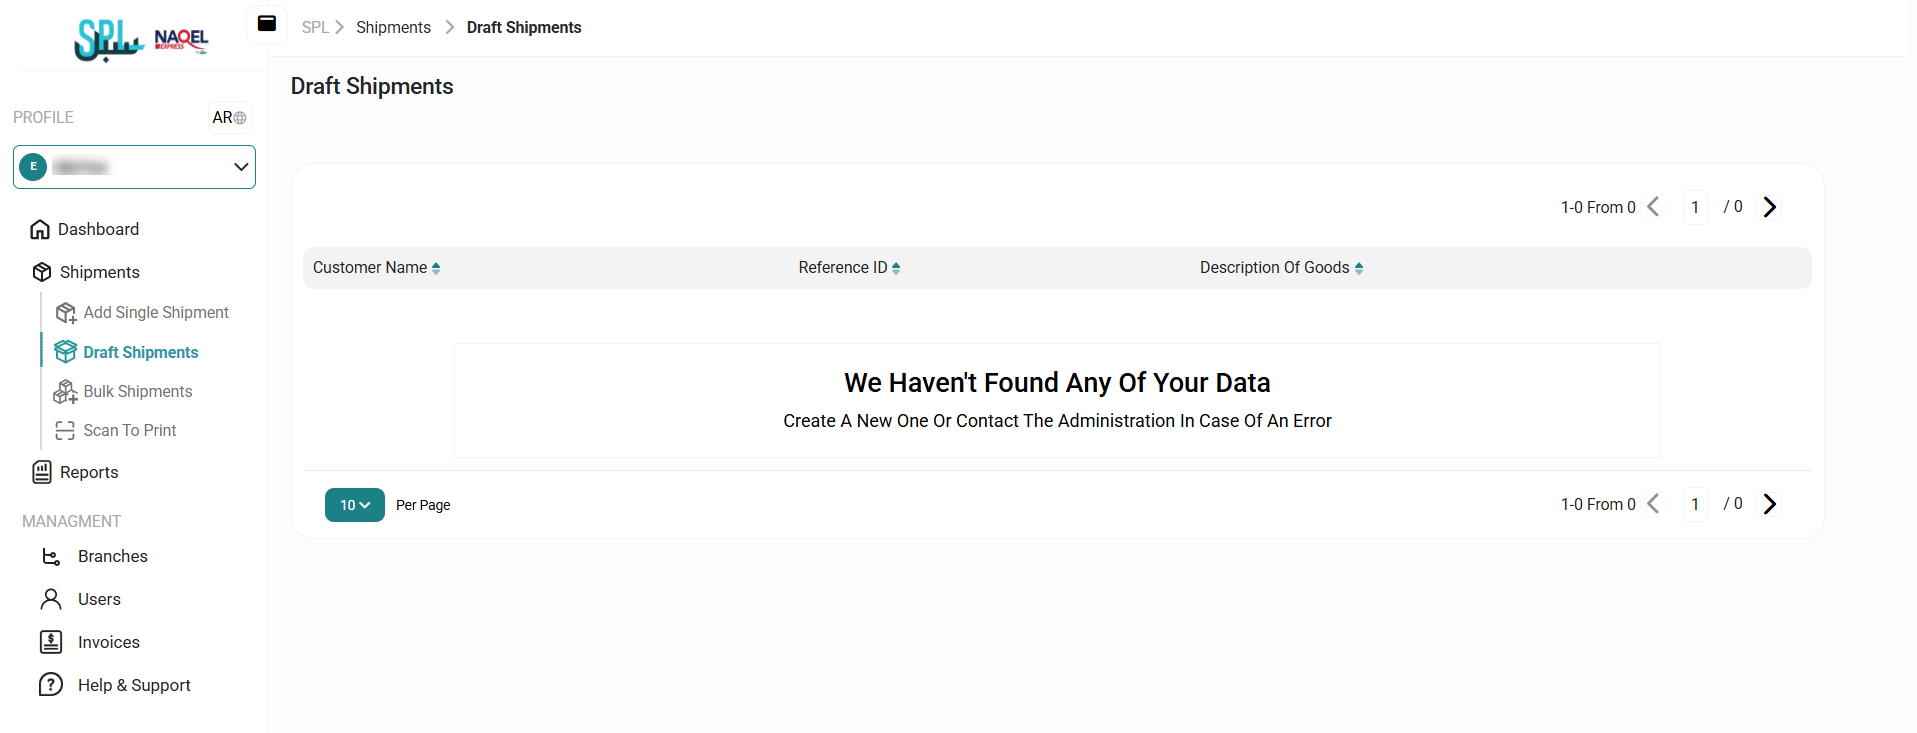
2.3 Draft Shipments
The user can view list of draft shipments in the system by navigating to the ‘Draft Shipments’ screen via the Shipments Module and clicking on Draft Shipments as follows:
-
Per Page: the user can select the number of items to show on each page.
-
Actions: by clicking on this button the user can edit the shipment and delete it.
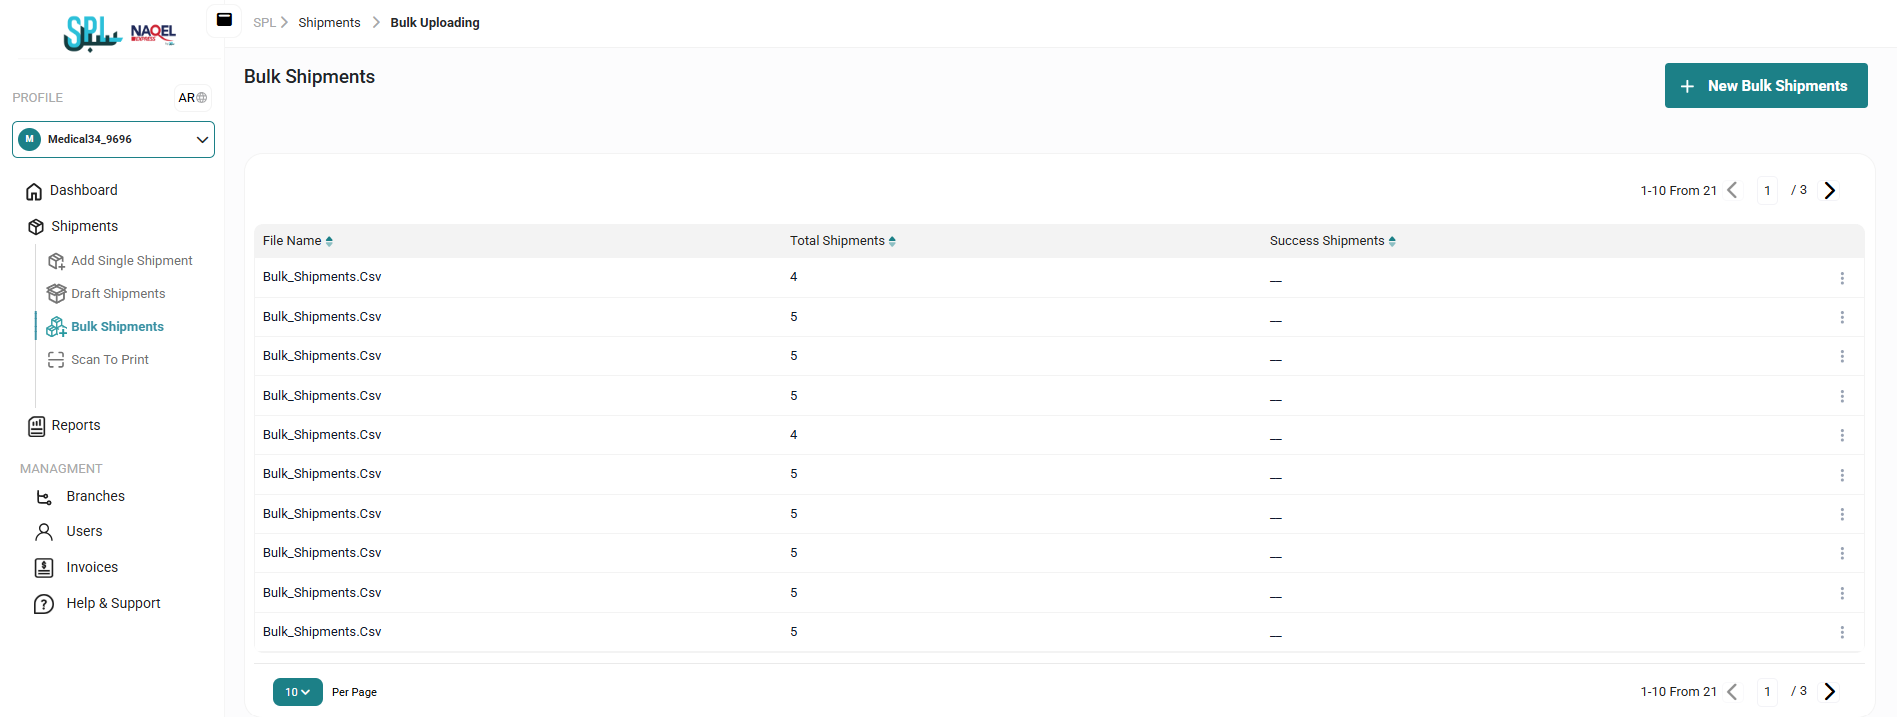
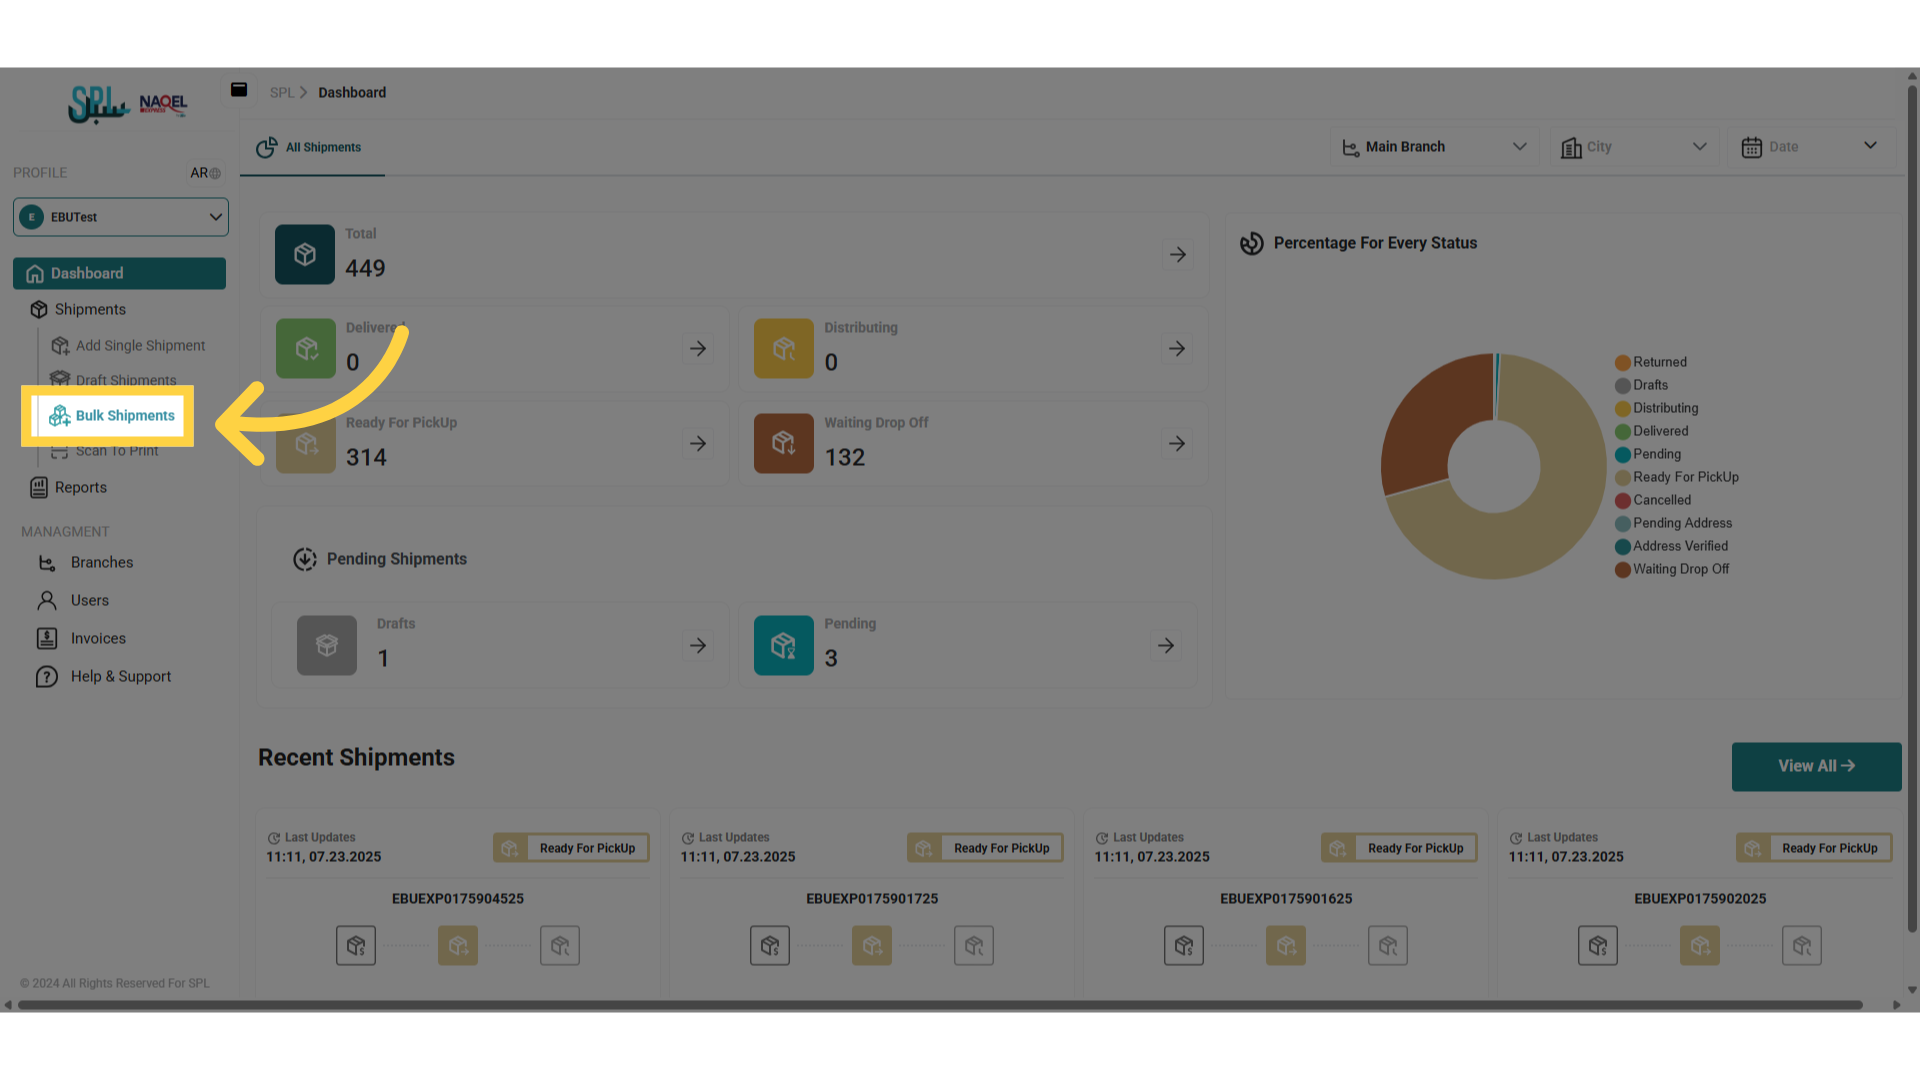
2.4 Bulk Uploading
The user can view a list of bulk shipments in the system by navigating to the ‘Bulk Uploading’ screen via the Shipments Module and clicking on Bulk Uploading as follows:
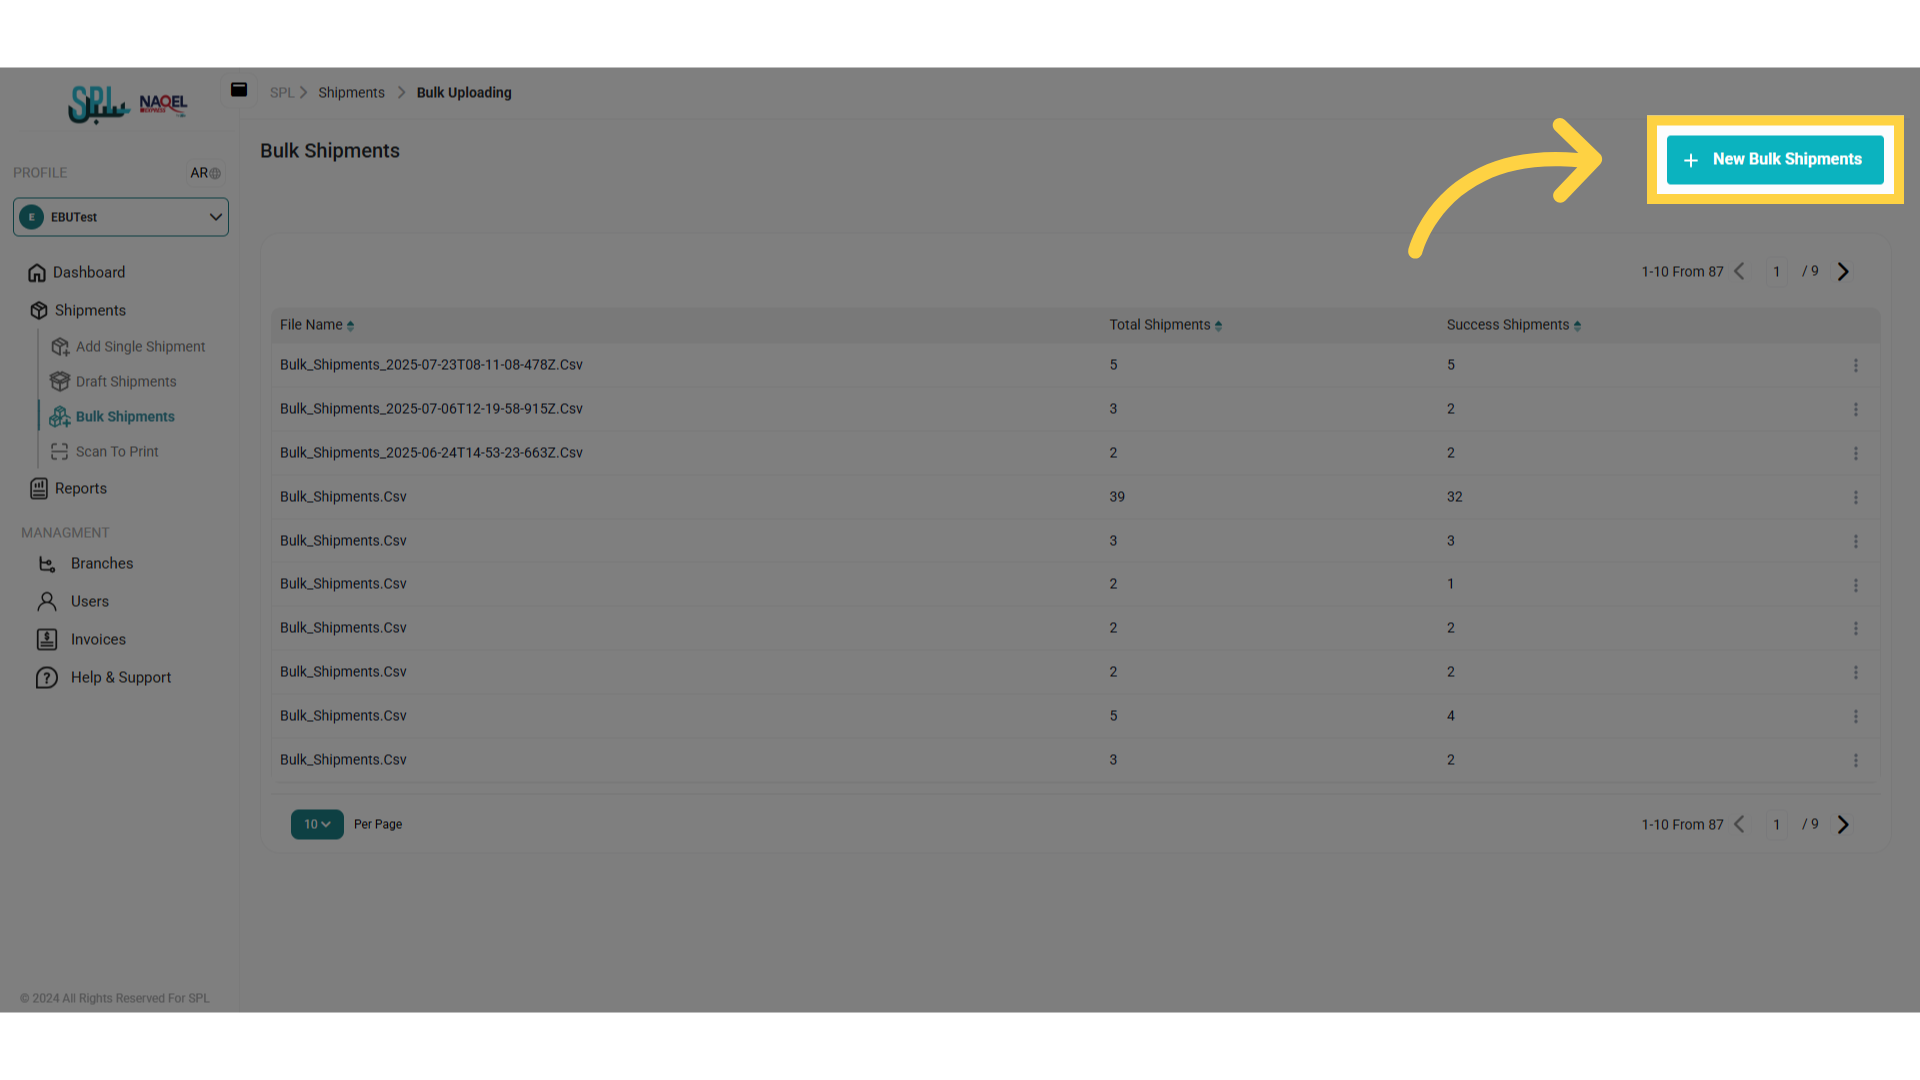
2.4.1 Add Bulk Upload
The user can upload bulk of shipments in the system by navigating to the ‘Bulk Uploading’ screen via the Shipments Module and clicking on Bulk Uploading as follows:
-
From the sidebar, select to Bulk Shipment:
-
Click on New Bulk Shipment button on the page:
-
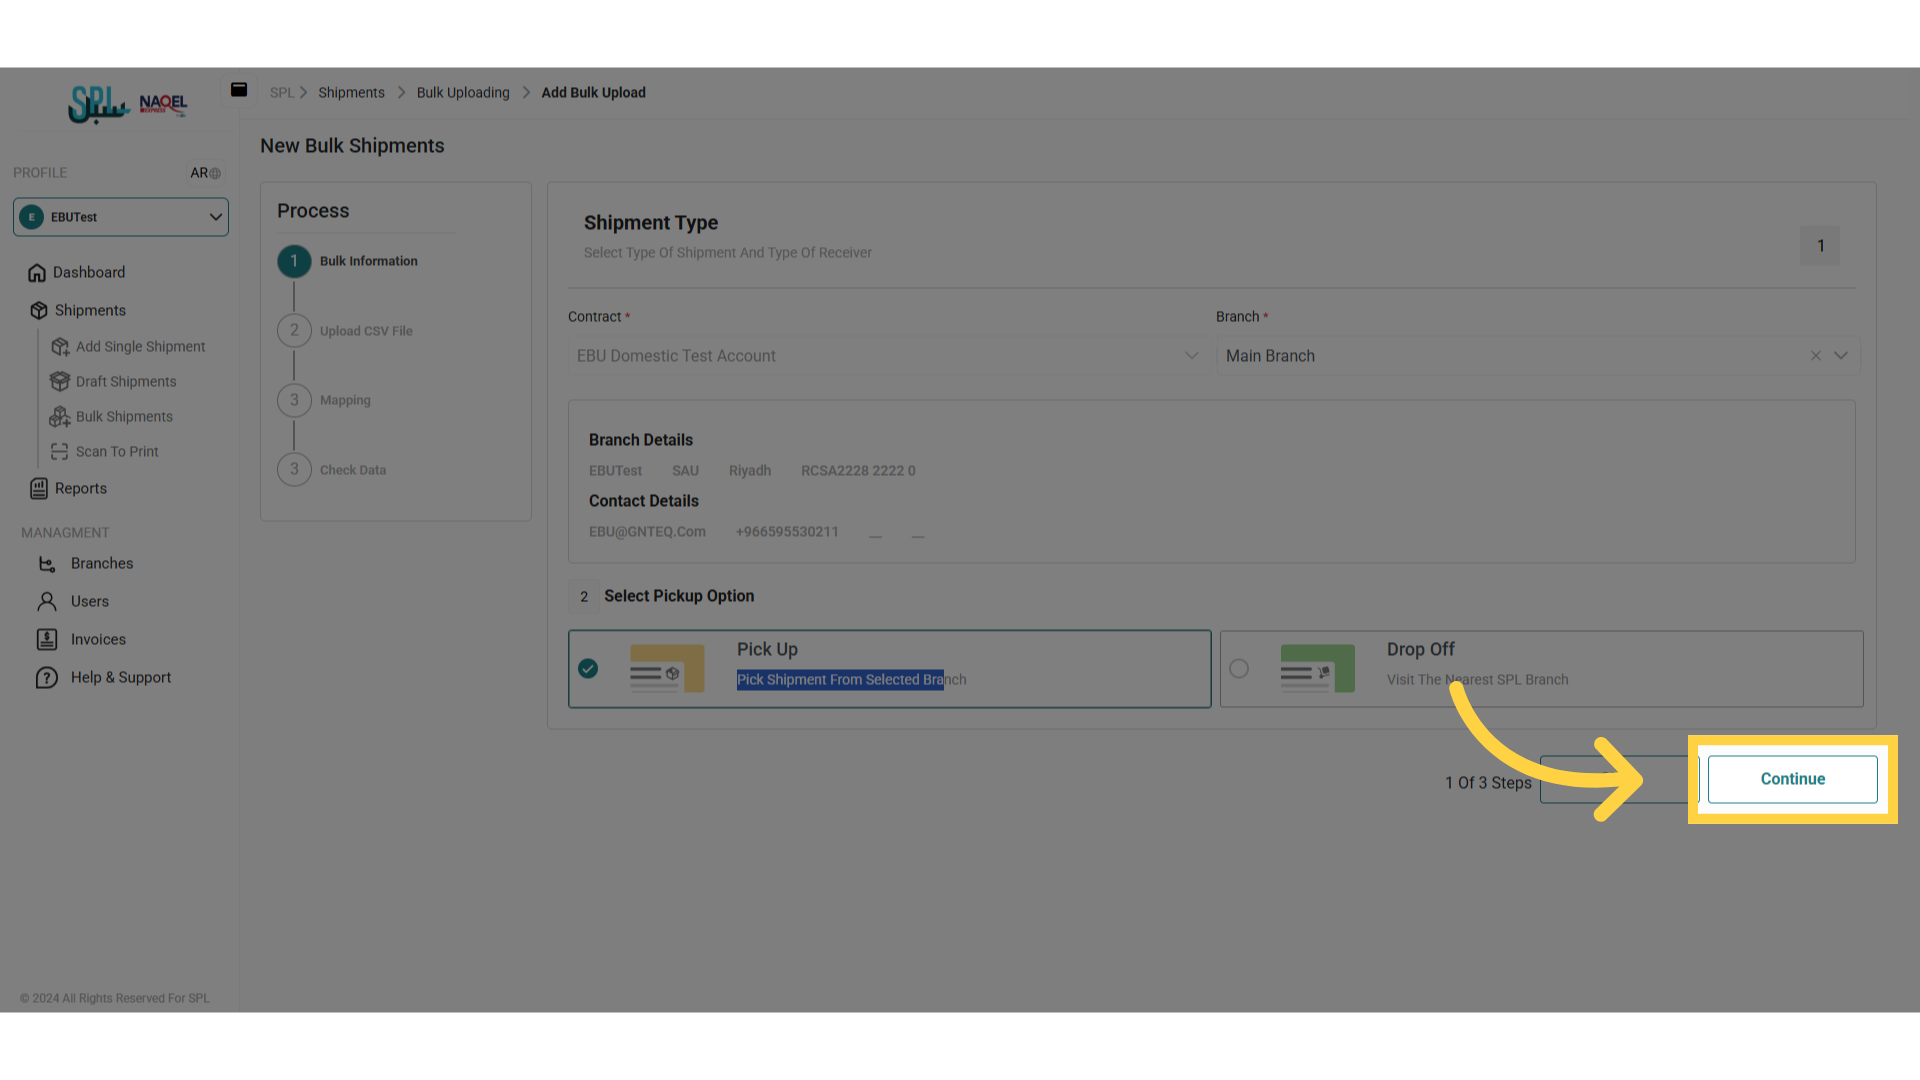
Fill in the fields with the information about the type of shipment and type of receiver option:
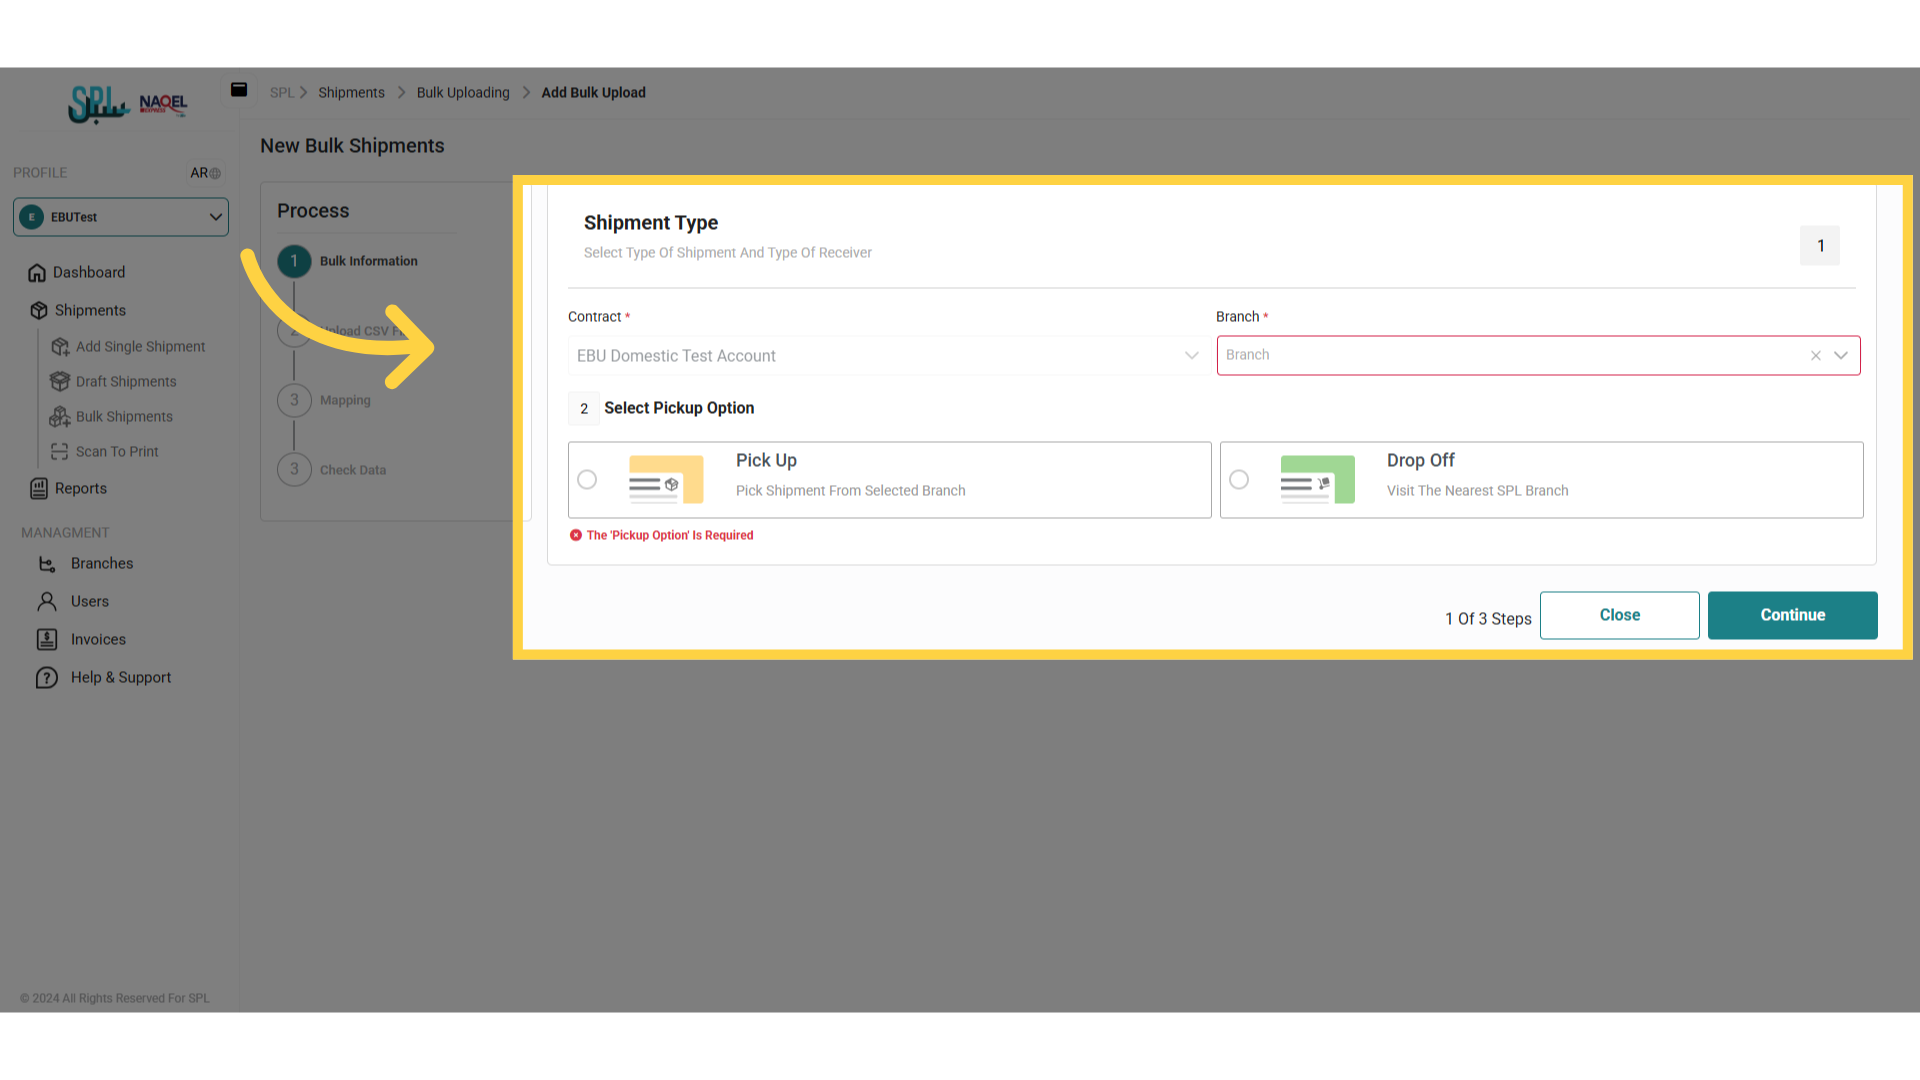
Select the " Branch" associated with the contract already defined in the system.
Then, select the pickup option to be created:
-
Pickup : the shipment will be collected from the customer's doorstep.
-
Drop-off : the shipment will be received at one of the SPL branches.
-
Click "Continue" to move to the next step:
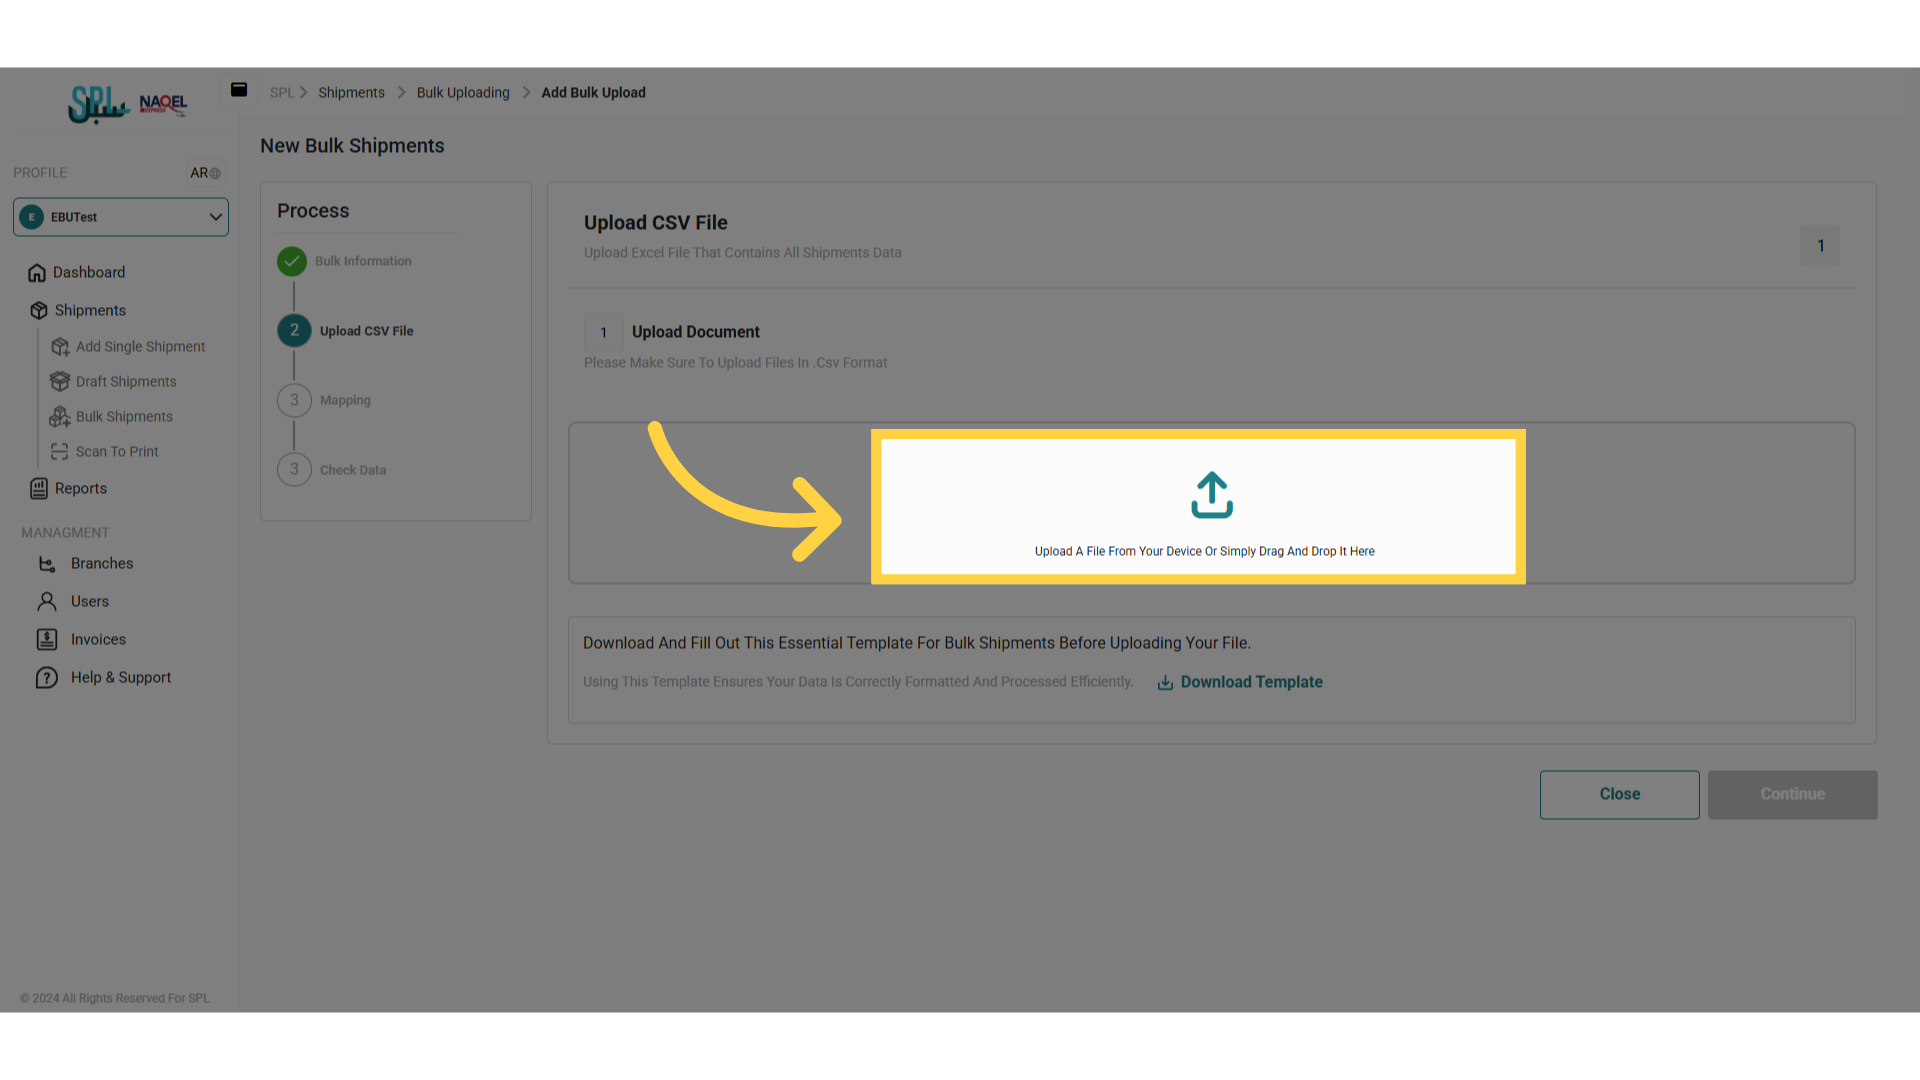
-
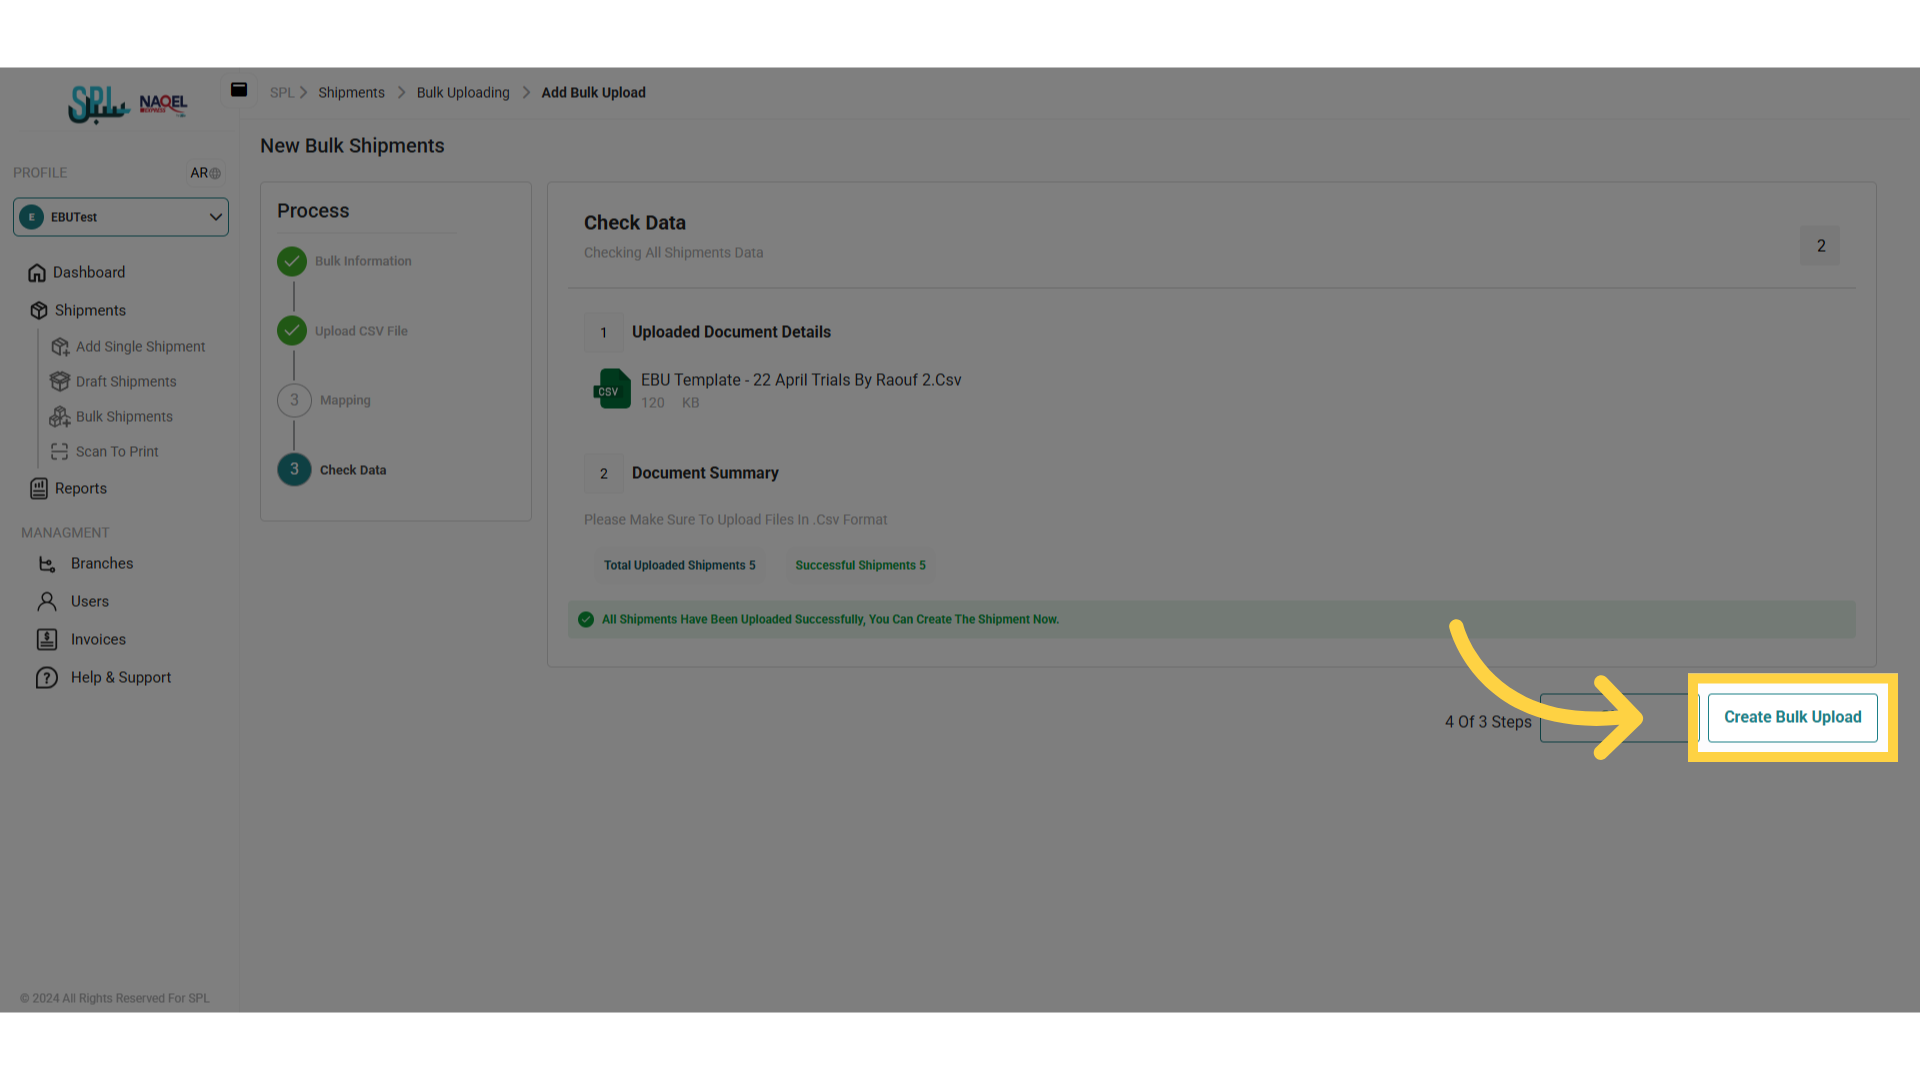
Click on the "Upload or Drag your file" form to download the CSV format form for uploading bulk shipments:
-
The file has been uploaded successfully as follows:
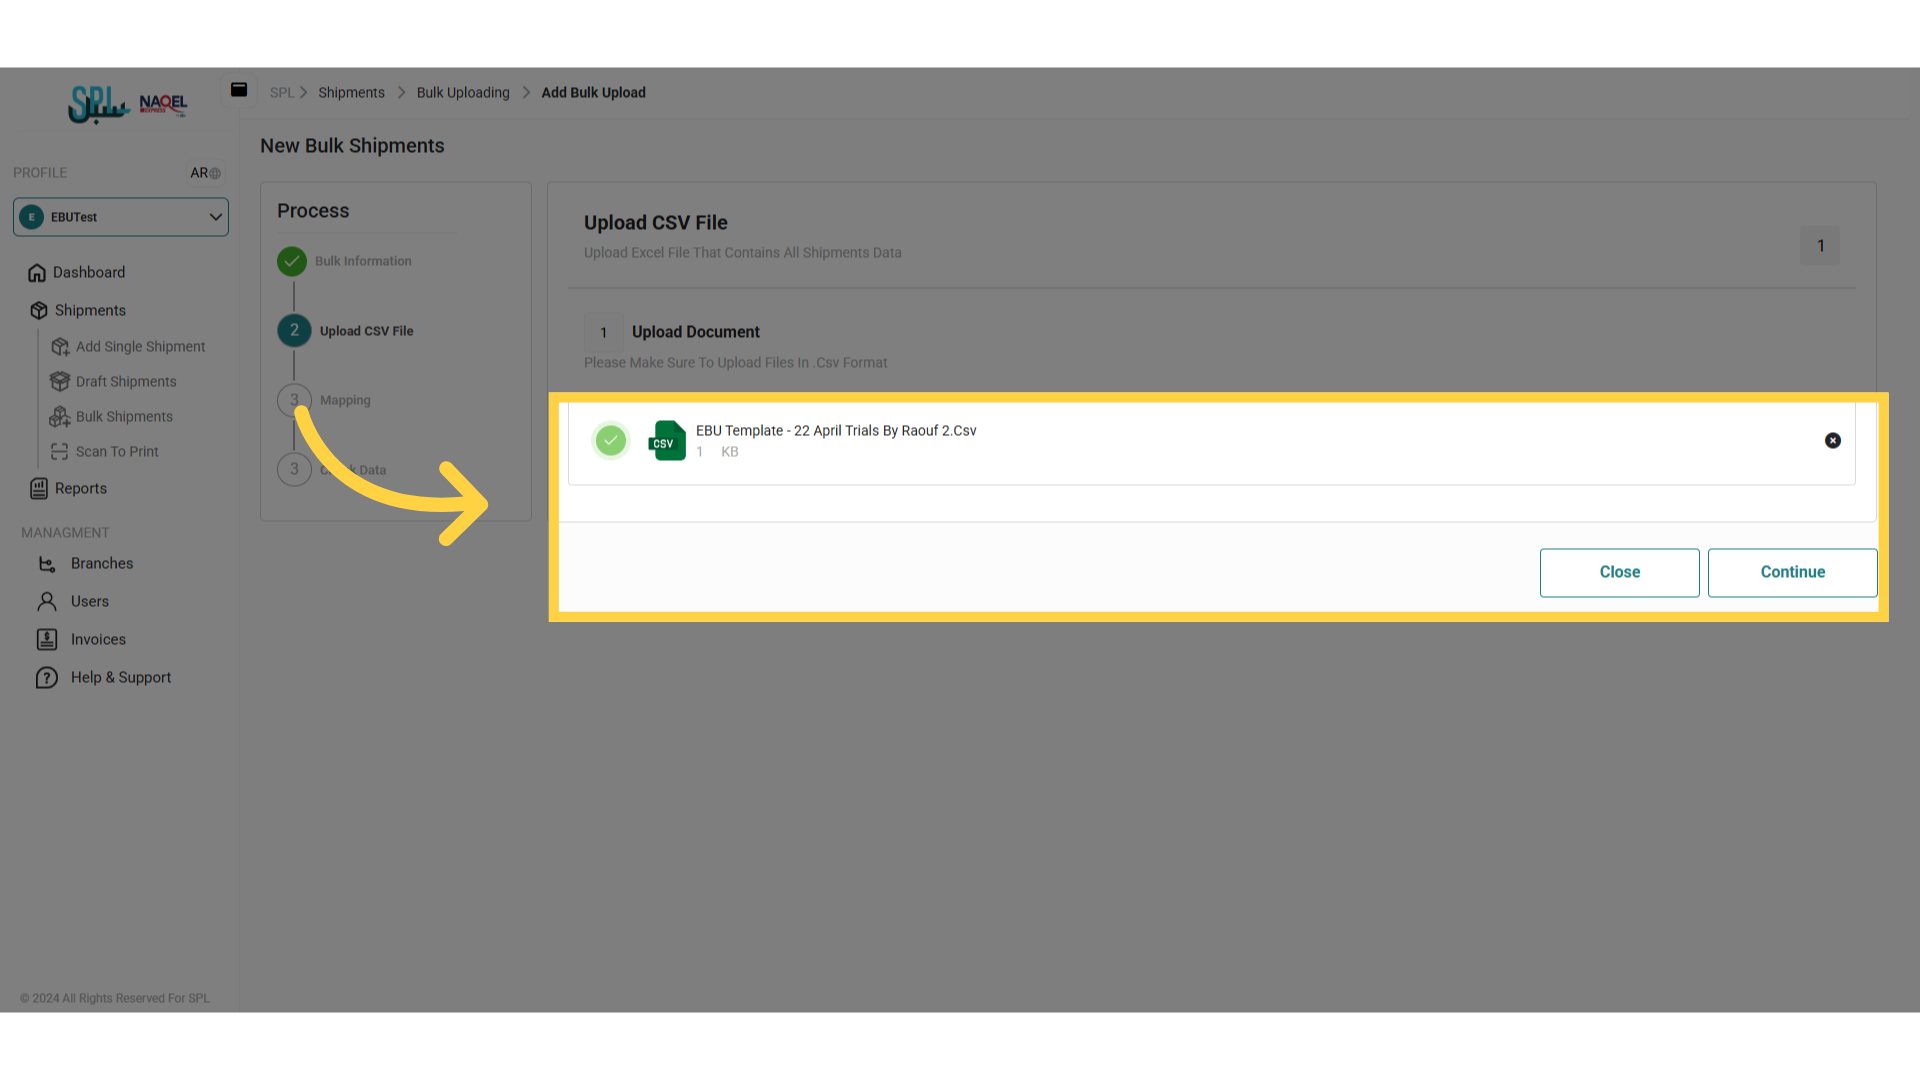
Click "Continue" to move to the next step:
-
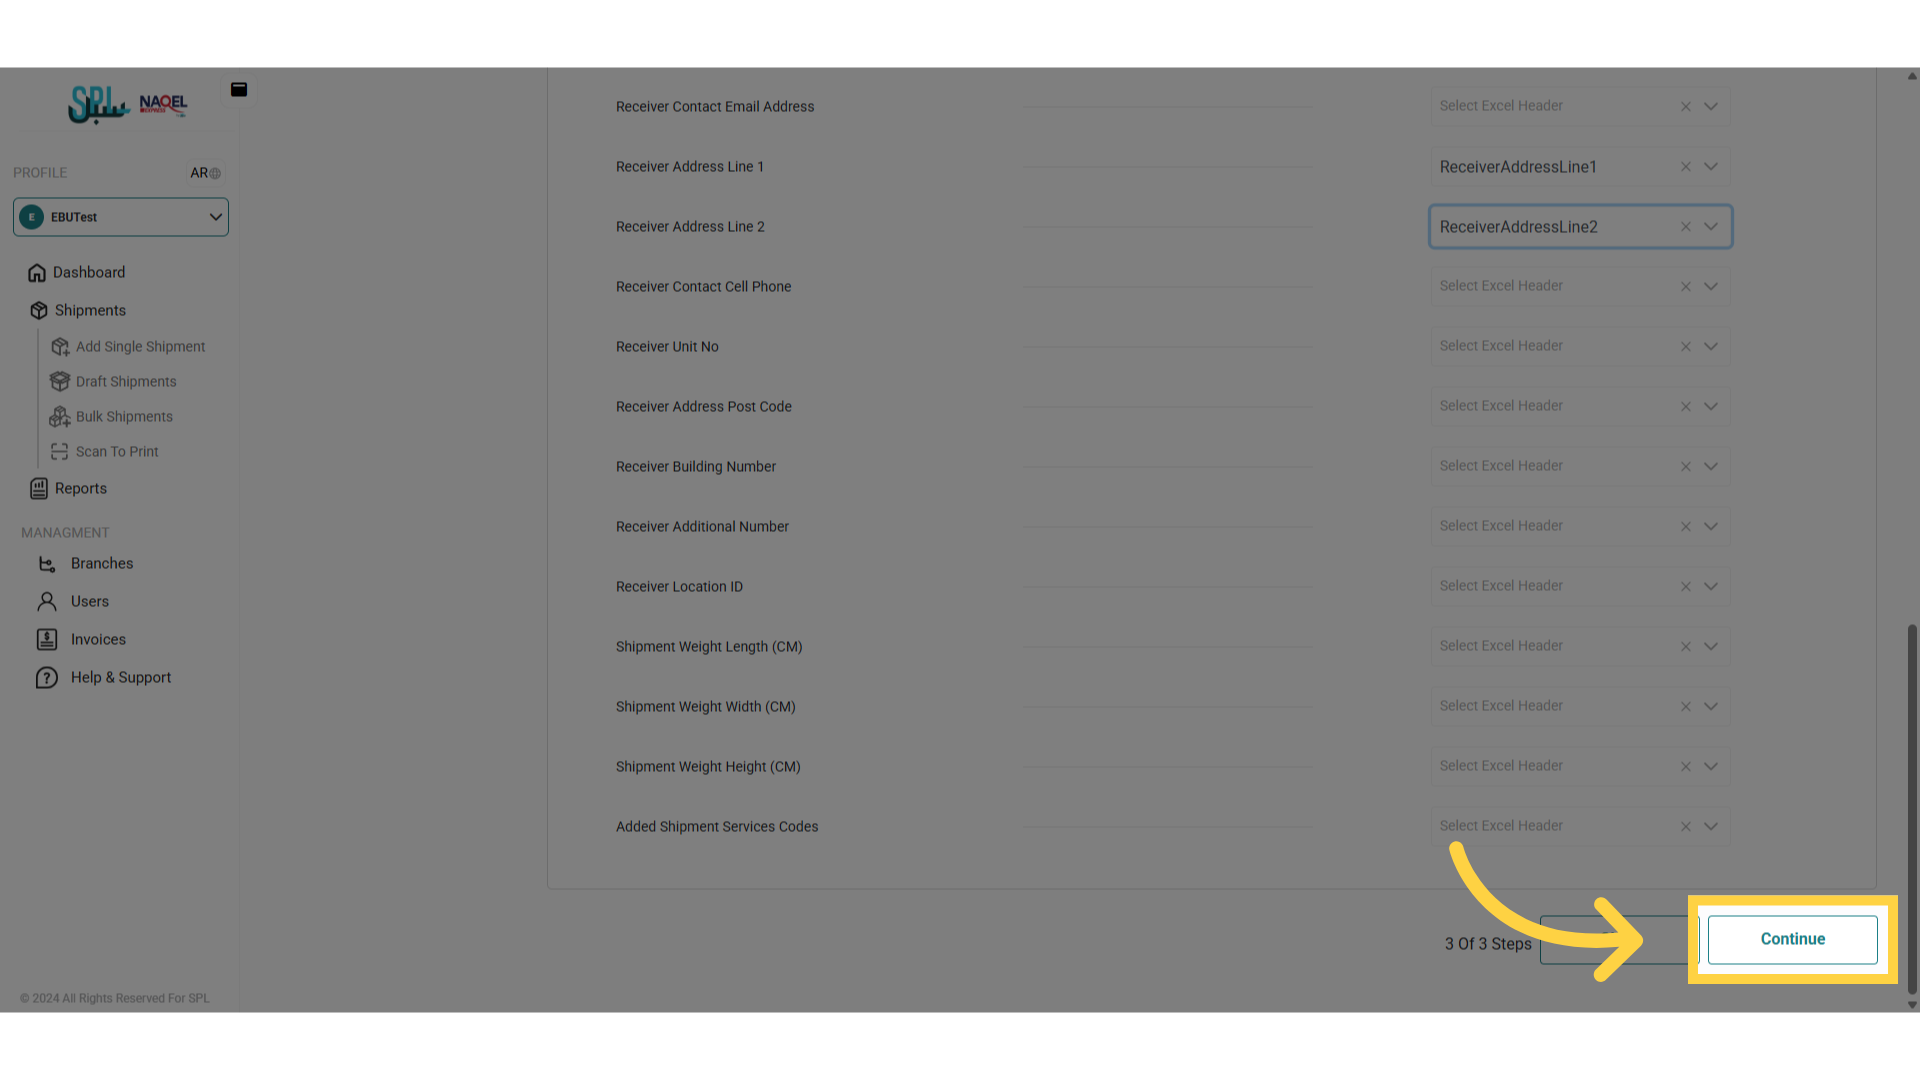
Set the "Main System Fields", "Addres System Fields", "Value Added Services System Fields" and "Additional System Fields" with the fields mapping as follows:
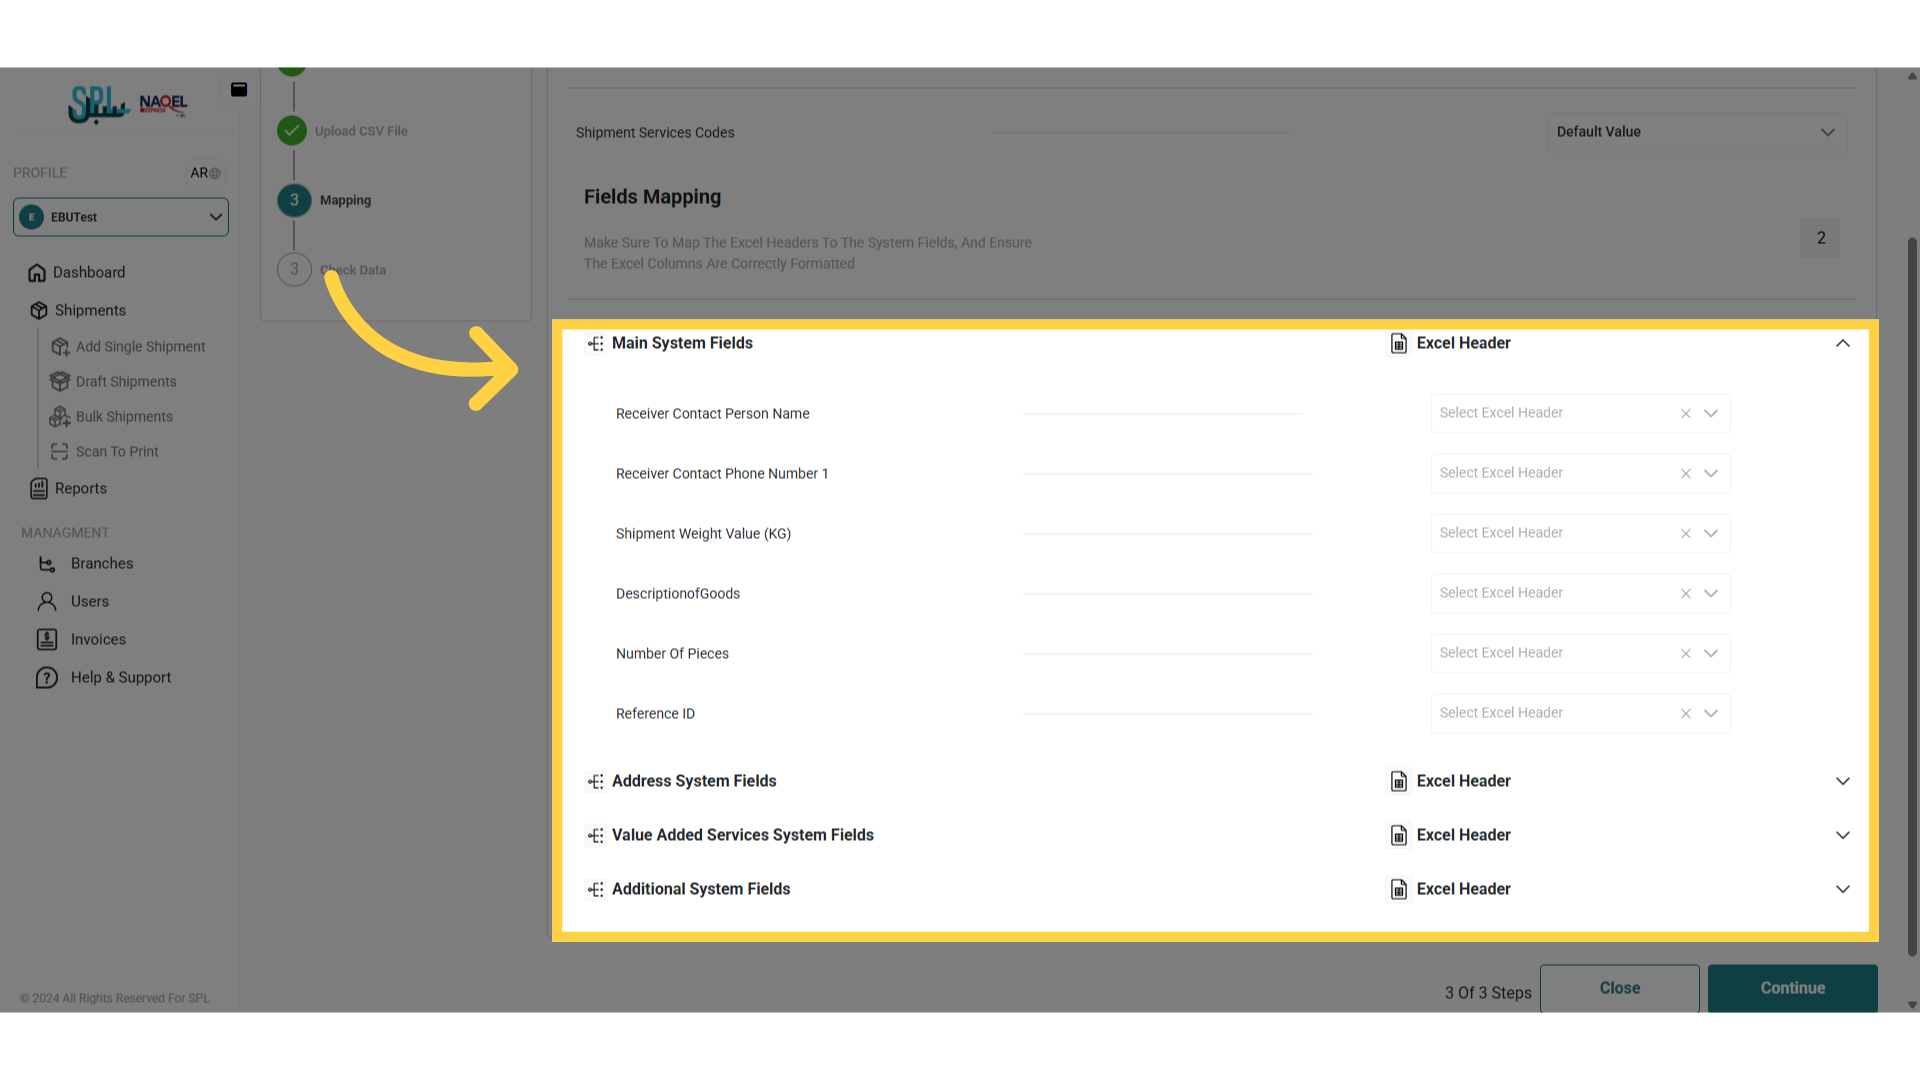
Click "Continue" to move to the next step:
-
Click on the 'Create Bulk Shipment' button to successfully create the shipments.
2.5 Scan to Print
The user can print the label for any AWB by scanning the shipment code (AWB) and navigating to the ‘Scan to Print’ screen via the Shipments Module as follows: